Search
Login
How to install a double-leaf interior door
A two-wing version of interior doors is usually used in two cases, a large doorway and a small room. Compared to one canvas, they take up much less space in the clear. There is another reason for this choice of double-leaf interior doors look very elegant, especially modern models of products. Their canvases can be oar and sliding. There are still swinging models, but they are used extremely rarely. How to install a double-leaf interior door? Installation of double-leaf products is simple, but it requires a certain sequence and knowledge.
Content
- Aperture preparation video
- Doorway calculation
- Door frame assembly
- Hinge installation video
- Installing the box in the doorway
- Installation of sliding interior doors
Aperture preparation
Before proceeding with the installation of the door, an opening is prepared for it. If there is a need to dismantle the old door frame, then this is done by mounting with a nail gun, a hammer and a screwdriver. Then the opening is cleaned of the remains of plaster and foam. Depending on the wall material, a grinder, chainsaw or punch is used to expand it. You can reduce the space to the required size with the help of lumber or plaster.

Walls should be ready for finishing and the door frame should be maximally aligned, should not be adjusted to their curvature and be knocked out of the plane.
Doorway calculation
There are two-door interior doors which do not fit the existing opening. The calculation of its width is carried out according to a simple scheme, plus the width of one blade, the gap between it and the beam and the thickness of the box. The resulting amount is multiplied by 2 and 4-5 mm for mortgages are added to it. For example, take the most common door width of 600 mm and a box thickness of 25 mm. (600 + 3 + 25) x2 + 4 \u003d 1260 mm. Similarly, its height is calculated. But here you should take into account the gap between the door and the floor 10-20 mm. 2000 + 10 + 25 + 15 (clearance between the frame and the door) \u003d 2050 mm. When constructing the threshold, the height of the door, the double thickness of the box and the gap between it and the canvas, multiplied by two, are summarized.

Door frame assembly
Assembly of the finished box
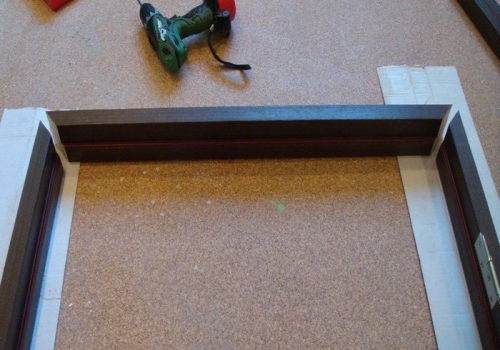
Modern door models come complete with fasteners and box parts, ready for assembly. In this case, the work does not require much effort. It is necessary to determine the side of the opening of the canvas, measure the length of the racks, taking into account the unevenness of the floor and the prepared opening. In accordance with its height, saw off the bottom of the racks. Then install the dowels in the holes located in the end sections on the side racks of the box. Tighten the parts to a full fit and secure them with angle brackets. To do this, special grooves are located on the back of the box.

Door blocks can be sold fully prepared for installation, with landing grooves for hinges, or can be without them. In this case, it will be necessary to carry out a series of actions to cut them out about this process will be described below.
DIY box installation
When assembling the door frame with your own hands, first of all, you need to adjust the beam to the dimensions of the canvas. Its dimensions are double web width plus 6 mm for gaps. When calculating the height of the box, 10 mm is added to the dimensions of the door for clearance from below and 3 mm from above. The upper beam and the ends of the racks adjacent to it are cut off at an angle of 45.

Then the door frame is assembled, its corners are fastened with three self-tapping screws, the length of which should reach the center of the second beam. Two of them are screwed at an angle from the side up, the third is located between them, but screwed on top.
Hinge installation
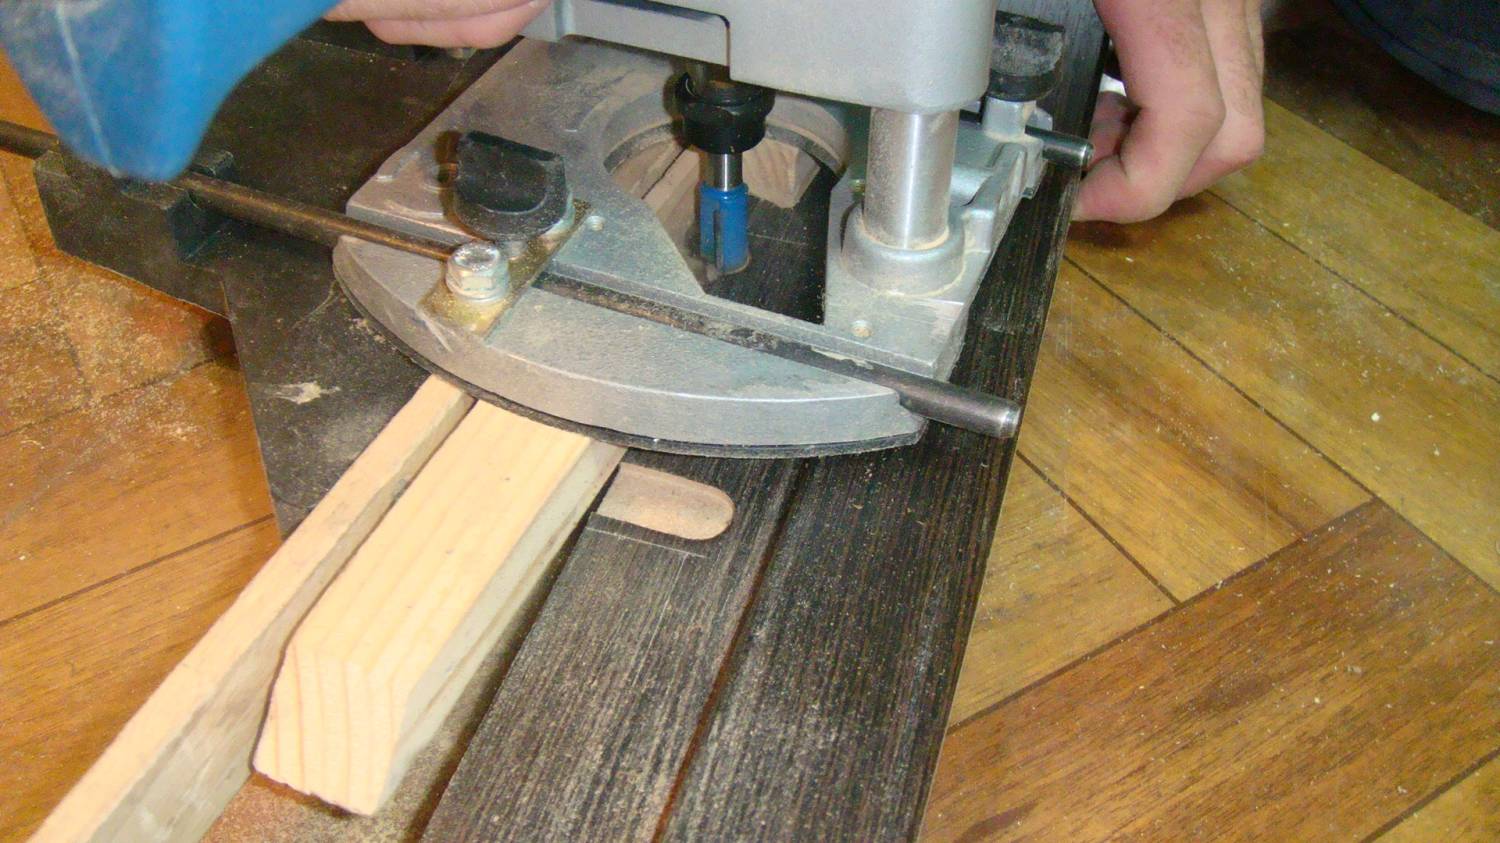
The doors indicate the location of the mounting-rotary devices. To do this, 20 cm are measured at the end of the web and a loop is applied. Its contour is outlined with a pencil or a sharp knife, and a groove is selected at this place to the required depth. It can be done with a chisel, but in order to make the notch neat, it is better to use a milling cutter, it will allow you to work more accurately and quickly.

Through the loop plate attached to the grooves with an awl, places for self-tapping screws are marked and guide holes for them are drilled. Their diameter should be 1-1.5 mm smaller than the corresponding dimensions of the screws. In the same way, a recess for the crossbar is made on one of the wings.
Then the doors are superimposed on the box, a place for loops is marked on the side bars and in the same way as on the canvases, a groove is made for them. There are modern fastening and turning devices that do not require such work. But butterfly hinges are not very popular among door masters too many complaints and they prefer time-tested mechanisms.
Hinges are installed on both doors and racks, and a bolt is placed on one of the canvases.
Installing the box in the doorway
When installing the assembled door frame in the opening with the help of a level and a plumb line, the accuracy of its horizontal and vertical position is checked.
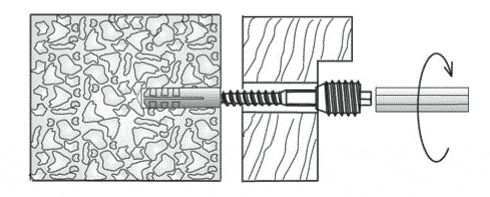
The structure is attached to the wall with long screws (8-10 cm). First of all, the side posts are fixed. Between them and the wall you can install wooden spacers.

The resulting space around the perimeter of the box is filled with foam. It should take into account the degree of expansion of one to five. Door unit parts must be protected from foam. After it dries with a knife, excess is gently removed and the gap is closed with a platband. The door leaf is hung in place and a hole is drilled at a slight angle for the bolt locking plate.
Installation of sliding interior doors
Rail mounting
Interior double-leaf sliding doors whose photos can be found on the Internet are a good alternative to swing models. They free up space, which is very important for a small apartment area.
In the case when it is planned to install double-wing interior doors with your own hands, you should pay special attention to the material of their manufacture. If one guide is sufficient for a wooden door, then a heavy glass product will require the installation of two structures. Moreover, the lower of them is better to plan in advance so that it is possible to deepen it into the floor. In any case, it is attached to the finish of the floor, to its concrete base. The horizontalness of the guide is checked by level.
In order to determine the place of the upper guide, which is attached first, the door leans against the opening and a horizontal line is drawn along its upper edge. It should be borne in mind that a gap of 10-15 mm should remain between the floor and the canvas. You can immediately put a gasket of the required thickness under the door.
The wooden block on which the guide will be mounted must be placed strictly horizontally, otherwise the doors will either not open or will spontaneously move to the side. It is fastened with dowels or self-tapping screws, depending on the wall material. In addition, there are models with a guide that is mounted on special brackets or to the ceiling.
Stepping back from the wall 2-3 mm, a guide is installed on the lower edge of the timber with the help of screws. It is exhibited strictly in terms of level.
The next step consists of attaching the roller mechanisms to the door. On the upper end of the canvas, it is measured from two sides at 20-50 mm, and the brackets are screwed on with screws. If the lower guide is installed, a groove with a depth of 18 mm is made in the lower part of the doors. Its width should be 2mm larger than that of the lower rail, made in the form of a flag or knife. Since it is not easy to carry out this process at home, it is better to choose a lower guide consisting of a U-shaped profile or two rails.

Curtain web
Rollers with supporting screws are inserted into the upper guide. At its ends, limiters are installed. The canvas is installed on the flag of the lower rail and is hung with brackets on the screws. Lock nuts are slightly tightened. By turning the screws on the brackets, the door is adjusted vertically, taking into account the clearance above the floor. A second door is hung in the same way. Then, with the help of a wrench, the nut is finally tightened, and the webs are locked on the rollers.
The final step in the installation of sliding doors is the installation of fittings and decorative strips that mask the guide rail.


