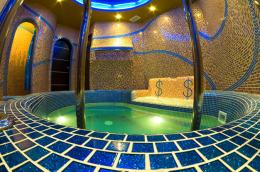
Search
Login
Recommended
Do-it-yourself building a sauna with a swimming pool on a personal plot
Each owner of a country house at least once in his life thought about the possibility of arranging a sauna in the yard, and even preferably complete with a pool. We will talk about where to start building a sauna with a pool, what difficulties and nuances you will encounter at various stages of construction, in our article.
Content
- Where to start building a sauna with a pool
- Sample design of a sauna with a swimming pool inside
- An example of a project of a sauna with a swimming pool on the street
- The main stages of the construction of a sauna with a swimming pool
- Design of a sauna with a swimming pool. A photo
Where to start building a sauna with a pool

Building a sauna, like any other structure, begins with the development of the project.
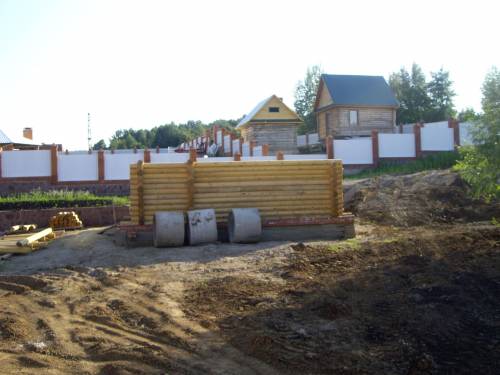
It is at the stage of creating the project that it is necessary to solve such important issues as: size of the future sauna, location basin (inside or outside) and its size, number of rooms, type of foundation, the possibility of water supply and sewage, the arrangement of a ventilation system and the choice of building materials.
Also at this stage it should be determined: where the pool will be located, and what shape it will be. It is worth noting that a rectangular pool will be much cheaper, and it will be easier to equip it.
If you have no desire to puzzle yourself create a sauna project or, if you do not have the necessary knowledge and experience, you can turn to specialists of some construction organization for help or find the most attractive ready-made project on their websites. Some examples of such finished projects will be given below. When choosing a ready-made sauna project, you need to make sure that there is a drawing diagram, which contains a detailed description of the sauna and pool and materials for their construction.
Also at this stage it is necessary to decide what type of sauna you want. Depending on humidity and air temperature in the steam room there are several types of saunas. The most common are: Russian bath, Finnish sauna and Turkish sauna. By the way, the traditional design of a sauna with a swimming pool will depend on the type.
Properly prepared ready-made design of a sauna with a swimming pool will allow you to calculate the approximate cost of construction.

If the pool and saunas will be in the house, then the need to create a project for a new building disappears and the problem of competent isolation of the selected room and the arrangement of a pool in it come first.
Sample design of a sauna with a swimming pool inside

Since under this project the pool is located inside the sauna, the structure itself will be quite impressive in size. Below is the design of the sauna, which provides technical, ground and attic floors. The total area of \u200b\u200bthese premises is 378 square meters.
On the ground floor of the building there is a SPA room, a swimming pool and the sauna itself, the attic space can be used as you wish. If the sauna will be built next to the apartment building, the project provides for a closed passage between the buildings and a small terrace.


The proposed sauna plan with a swimming pool involves the use of the following structures and materials:
- Monolithic reinforced concrete foundation;
- Walls made of brick or gas block with insulation;
- Gable roof with a coating of metal;
- The facade is decorated with plaster and decorative finishing materials.
An example of a project of a sauna with a swimming pool on the street

The construction of a sauna with a pool outside has its pros and cons. The main plus in this project is cost savings, since the pool will be located on the street, and the building of the sauna itself will not be so large that, of course, will positively affect the cost of construction. But the main and rather not the least significant drawback is the pool, which can be used only in the summer.

This project provides for the arrangement of a monolithic reinforced concrete foundation, walls made of wood and a gable roof with a coating of metal tiles.
The main stages of the construction of a sauna with a swimming pool
Building a sauna with a do-it-yourself pool is not an easy task, and in order not to make fatal mistakes, you must adhere to a clear plan of action. We will talk about how to properly equip the pool, lay out the floor, conduct an electrician and equip your sauna.
pool arrangement

The preparation of the pit for the future pool must be carried out at the very beginning of construction, otherwise you will have to face a lot of inconvenience associated with the removal of soil. The pit is made a little more than the final size of the pool.
After the pit is ready, you need to make a pillow out of gravel, falling asleep to a depth of 30-70 centimeters. The bottom of the future pool should have a slight slope, where a drain will be installed at the lowest point. A pipe with a diameter of about 10 centimeters is immediately mounted in the place of discharge, after which it is necessary to add sand (5-7 centimeters thick) and level it. Next, using rubber, polyethylene or polyvinyl chloride films, we lay the waterproofing of the future pool.
When the waterproofing is ready, we lay the reinforced mesh and fill the bottom with concrete. In parallel, the pool walls are also filled. To do this, it is necessary to install the formwork with the expectation that the thickness of the walls of the pool will be approximately 20-25 centimeters, then place the reinforcing mesh inside and pour it with concrete. Also, the walls can be bricked.

After the concrete is completely dry, it will be possible to remove the formwork, plaster the walls with a cement screed (2-3 cm thick) and cover it in two layers with special waterproofing material. Then you can start finishing the pool, however, this is best done after the building of the future sauna is built.
building a frame for a wooden sauna

In this article we will consider the most simple and inexpensive version of the sauna frame. The binding for the sauna is, as a rule, five-level. In such a strapping, the first horizontal line of the frame beams is fixed at a height of 3 cm from the floor, the second at a height of 60 cm, the third at a height of a meter from the floor, the fifth line should be five centimeters from the floor, and the fourth in the middle between the third and fifth lines . Do not forget to take into account the place for the front door in the frame. For these purposes, two racks are mounted on which the door frame will be mounted, and above them a horizontal bridge is installed necessary for fastening the casing material.
We recommend using wide boards for the ceiling frame. They should be placed parallel to the walls of the sauna and to each other.
wiring
When the roof and walls of the building are ready, you can start wiring electricity to the sauna.

However, before starting the installation of electrical wiring, you must accurately determine the location of the fixtures and equipment. Wires are conducted on the outside of the frame at its lowest place.
The main stages of wiring:
- Cable entry into the sauna. Specialists recommend laying the cable in the insulating pipe through the wall. Also, the cable can be inserted in the ground, but it is somewhat more difficult and more expensive to accomplish.
- Install the shield. The switchboard must be in a fireproof place, to which free access is provided. With single-phase wiring, the shield must have at least three wires. Input and outgoing cables must be removed from the shield using a corrugated pipe. The cable cross-section must be selected based on the planned wiring load. For example, with a light load (operation of additional electrical appliances) of 5 kW, a cable with a cross section of 4 mm is perfect. square. For cables extending to the lighting, a wire with a cross section of 1.5 mm is sufficient. square. Automata should also be selected based on the above principle.
- Cable routing.
- Connection of lamps, sockets and additional electrical appliances.
floor

Most often, an environmentally friendly wooden floor is chosen for a sauna, although this is also the best option for premises of this kind.

However, if it is wood that will be used as the flooring material, remember to coat it with varnish in no case.

Meanwhile, the tiled floor is the best option for a sauna, both in price and in quality. It is quite easy to lay, and care for such a floor does not require much effort.
Before finishing the floor in the floor, it is necessary to equip the drain for water.
sauna insulation
If we talk about the insulation of the frame sauna, then it is done by laying insulation plates between the vertical and horizontal cells of the frame. Or mineral wool can be laid between the wall of the room (if the sauna is built, for example, from brick) and wooden panels for finishing the sauna.

After that, it will be necessary to provide vapor barrier protection using foil attached to the frame with the mirror side using a special adhesive tape.

The use of this foil will also contribute to faster heating of the room and long-term preservation of heat in it.
arrangement of a sauna

Kamenka The main component of any sauna or bathhouse, which you can buy ready-made or make it yourself. Stones for the heater are selected massive, preferably round and smooth. They need to be changed approximately once a year or more often depending on the intensity of sauna operation.
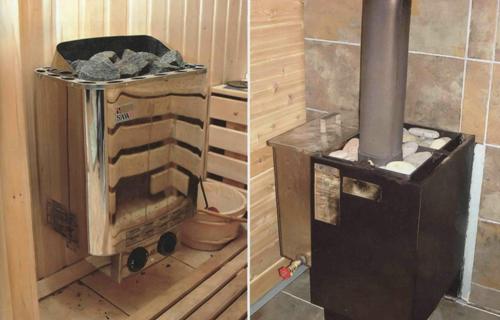
Kamenka can work both on wood, and on electricity. In the latter case, the power of the heater heater must be calculated on the basis that 5 kW of heater energy is needed per meter cubic volume of the steam room.

Do not forget about the equipment ventilation systemsotherwise the bathhouse may become damp. Ceiling and exhaust openings with gate valves must be equipped near the heater at a height of 30 cm and opposite the stove at a level of 30 cm from the ceiling.
Well, the relaxation room in the sauna.
Design of a sauna with a swimming pool. A photo
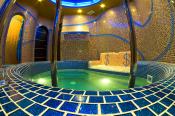
The best decoration of the sauna at all times were considered to be wood, stone and mosaic. It is with their help that you can create a unique and at the same time relaxing atmosphere. If you prefer to use wood in your sauna decoration, breeds like abach, aspen and linden will be the best choice. Coniferous wood for sauna decoration is best not to use, as they will invigorate you, and not relax.


If desired, in order to create a special atmosphere, a beautiful decorative panel with exotic or summer motifs can be placed near the pool.

The unique atmosphere of the sauna can be emphasized with the help of various bath paraphernalia with a beautiful wooden tub with water, terry bathrobes, towels, etc.

