Search
Login
We lay paving slabs, step-by-step instructions for laying paving slabs
In a previous article, we examined the popular material for paving paths on a summer cottage, paving slabs, learned how it is made, which has properties and technical characteristics. Having learned the parameters of the material, you can begin to describe the basics of technological processes associated with the laying of products. The article will give important tips on the use of paving slabs, and those craftsmen who decide to make paving slabs with their own hands can safely perform this, in general, not the most difficult procedure by reading the step-by-step instructions and armed with the necessary tools.
Content
- The choice of paving slabs
- Marking and preparation of the territory video
- Paving slabs
- Styling tool
- Technology for laying concrete paving slabs video
- Features of paving paving stones video
The choice of paving slabs

Having decided on the paving of the territory of the summer cottage area with paving slabs, we must first determine the type of material that will become one of the design elements of the territory for many years, therefore, it is necessary to choose the tile carefully so that you do not have to make changes to the structure of the coating and repair the tracks , yard or car parking spot. For the correct selection of the tile thickness, it is necessary to calculate in advance the load on the surface for pedestrian paths, a coating thickness of 2-3 cm is sufficient, and for a car it is already necessary more than 4 cm.
The color scheme of paving slabs is selected based on the general color scheme of the site, including buildings, the easiest way, if in doubt, is to lay the light gray tile, it fits almost any background.
When purchasing tiles, it is very important to determine its quality, it is best to make a purchase at large building materials bases that have an established reputation and confirm the quality of their products with appropriate certificates. Chasing cheapness in this matter is definitely not worth it, because we equip external surfaces that are always in sight and should not only look solid and beautiful, but also be reliable in operation. Contrary to the stereotype, curly paving slabs are laid the easiest, but it’s more difficult to adjust the rectangular one due to the correct size, where any violation of the geometry immediately becomes noticeable.
Marking and preparation of the territory

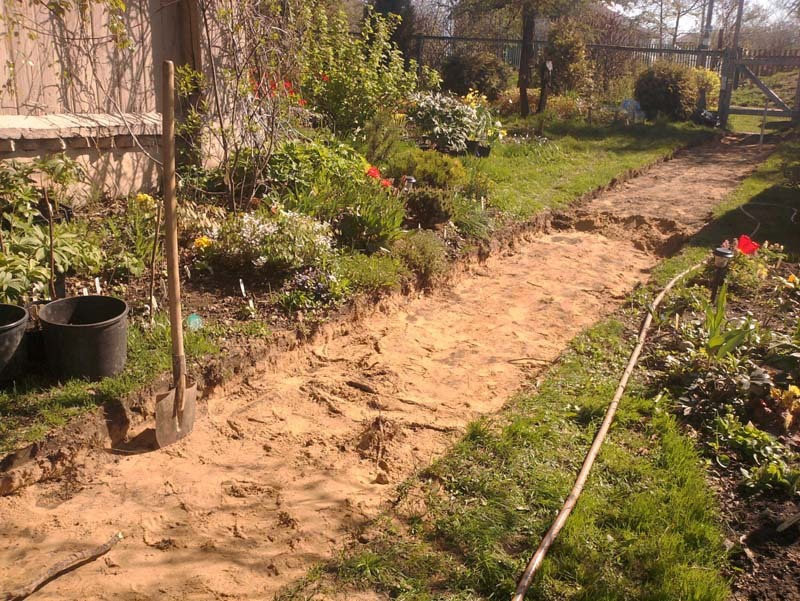
Marking the area for future paths and sites does not require much effort, it is only important to observe the necessary proportions and make a small margin of a few centimeters at the edges, which will allow you to have an admission and which can then be covered with soil if you get an extra distance from the edge. When marking, it is necessary to take into account the initial dimensions of the tile so that there is no need to shorten it later. This is not so difficult, since we are still often not limited to walls and other obstacles when paving paths. With the options for laying paving slabs, too, special difficulties should not arise in the finished landscape design of an uneven area, winding paths will fit in well, and if there are no geometric excesses, then it is more reasonable to make smooth footpaths, emphasizing the correct proportions. After marking at the place of laying, the sod is removed and the soil is removed to a depth, taking into account that, in addition to the tiles, there will be a rubble or sand cushion in the recess.

When preparing the territory, it is very important to provide for a surface slope, because water after precipitation should constantly go away, without eroding the structure of the tracks and not accumulating from above. It is great if there is a natural slope, otherwise the preparatory work must be carried out taking into account that the surface is inclined, for this more soil is taken out from the edge where the water drain is planned. If it is not possible to provide a bias to the side of buildings, a gutter is made for drainage. After removing the soil, the entire surface of the recess is carefully compacted.
Paving slabs
After marking and preparing the site for laying, you can proceed to the next step in selecting a drawing. There are a great many options and the possibility of combining different types and colors of paving slabs leaves such a great scope for imagination that it is important not to be too smart and make the picture harmonious, and not pretentious. It is best to observe the whole variety of design options from photographs, some of which are given below.
plain version

two-color option

multicolor option

variant with patterns

Styling tool
Tools and related materials for the process of laying paving slabs will not need so much. Are needed:
- shovel
- master OK
- mallet or rubber sledgehammer
- level
- thick fishing line or rope
- wooden pegs
- roulette
- cutting machine (grinder) with a diamond blade for cutting concrete
- hard brush or broom

In addition, sifted river or sea sand of fine fraction, cement, water, as well as crushed stone is prepared if backfilling will occur under the platform for driving through and parking the car. It is necessary to take care of protective clothing (glasses, gloves, overalls)
Technology for laying concrete paving slabs
The diagram shows what thickness of the pillow is used when laying tiles depending on the load.

After filling the recess, we expose the pegs and pull the twine strictly horizontally to the level of the expected slope, thus forming a clear outline of the site intended for laying. Then sand is leveled over the entire surface, so that its distance to the stretched thread is 8-9 cm (this distance also depends on the thickness of the tile, so 8-9 cm is the minimum distance for the thinnest paving slabs). The next step is to prepare a cement-sand mixture at the rate of 1: 6, while the sand should be slightly moist. The mixture is prepared in small quantities as each row is laid so that it does not dry out. The mixture is applied to the prepared surface, the tile is laid on top, pressing with your hands and adjusting the distance and depth, while the upper edge of the tile should not protrude beyond the thread. A mallet is used to fit. The rows are stacked on their own, that is, the movement is carried out on already laid tiles.
The joints between the laid tiles are filled with a cement-sand mixture, the procedure is simple, the mixture crumbles to the surface and sweeps into the gap until it is completely saturated. The entire technology of laying paving slabs with advanced specialist comments is shown in the video.
After laying the entire surface, it is advisable to ram the tile again, for which vibro-press is best suited, if it is not available, you can make a manual beater from a thick stump with a handle attached at the top so that two people can hold it. Depending on the purpose, a curb is installed at the edges of the site or path, for which, after laying the entire tile, a trench is dug, a crushed stone and sand cushion is poured into it, and a curb stone is placed on top. Cobble-lined curbs look good.
Features of paving paving stones

The above method of laying paving slabs is suitable for almost all types of this building material, but there are slight differences for laying pavers or clinker bricks, also used in this kind of work. They consist in the use of crushed stone in larger quantities than sand and crushed stone should be in a smaller fraction. Also, when laying paving stones, it is advisable to use a litter made of geotextiles, since granite from moisture has the property to bloom, that is, covered with small moss, spoiling the appearance, and a geotextile film will reduce the moisture from the soil on the surface of the paving stones. In addition, when laying paving stones of irregular shape, it is necessary to leave a larger gap between the blocks, thus, for closing the joints, much more sand-cement mixture will be required.


