Search
Login
The blind area of \u200b\u200bthe house with your own hands, from which you can make a blind area around the house
Even such a solid and reliable structure as a house, in fact, has quite vulnerable structures. First of all, the foundation of the house, its foundation, needs protection. It serves as a support for all elements, but its location poses a threat to the constant destructive effect of moisture contained in the environment. Moreover, moisture can enter the ground both from the rising groundwater level during floods, and from meltwater or stormwater penetrating deep into the ground.
Content:
- What is the failure of the blind area, what is its importance video
- Blind device
- How to make a blind area around the house with your own hands
- Blind area - step by step instruction video
- Some useful tips
- Features of the construction of the cobblestone pavement
- The blind area from paving slabs, what are its advantages video
What is the blind area, what is its importance
First you need to understand what the benefits of the blind area are. Its main task is to protect the foundation from moisture, sufficiently high-quality protection will prevent a very negative phenomenon, subsidence of the foundation, which over time can lead to the destruction of the house.
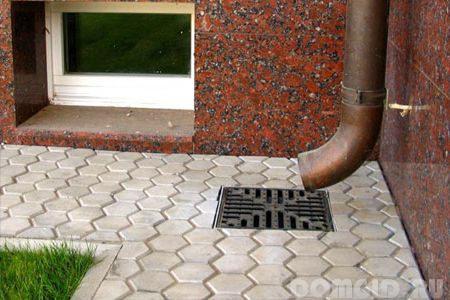
In addition to technical purpose, the blind area plays the role of decorative decoration adjacent to the house area. It frames the entire perimeter of the house, allows you to make a comfortable walk around it in any weather.
A well-made blind area will exclude the possibility of washing the house with storm or melt water, the soil as a result of this negative process is moistened unevenly, which threatens a sufficiently rapid appearance of cracks on the foundation or walls.
No less important point will be the blind area, properly constructed in the event that the house is on heaving ground. Sometimes for the destruction of a house on soils prone to swelling, one wintering is enough. The problem is that water-saturated soil gives uneven swelling. The pressure exerted in this case can sometimes cause serious damage.
Analyzing the essence of this problem, we can conclude that the blind area on heaving soils should be made insulated.
Experts argue that the construction of the blind area should be immediately after finishing the walls of the house and its basement. It’s quite dangerous to delay laying for the whole year, as some developers do.
Read more about the benefits of the blind area and the rules of its construction - in the video:
Blind device
The construction of any blind area consists of two elements:
- the underlying layer
- coverings.
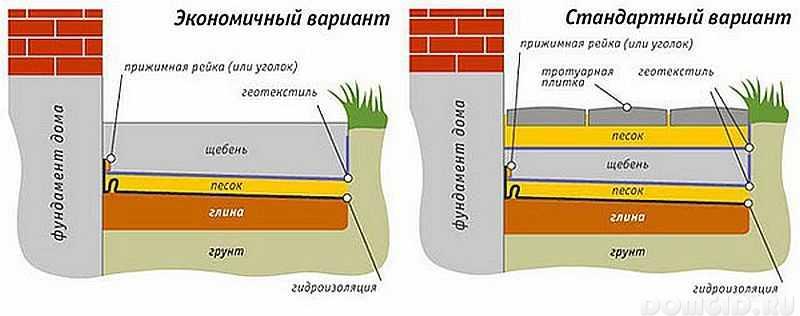
In the construction of the underlying layer can be used:
- sand and clay
- fine fraction of crushed stone, etc.
The thickness of the underlying layer should not be less than 0.2 m, its material in a particular case is selected depending on the coating.
In practice, different types of blind areas are used, but the following claims are presented to the coating materials:
- high degree of waterproof
- impossibility of destruction by water,
- sufficient decorativeness.
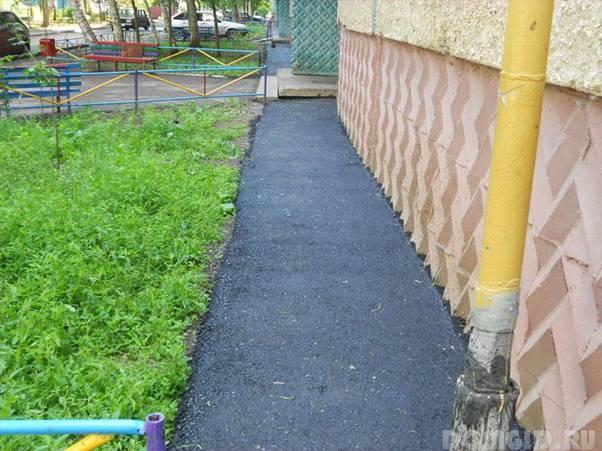
The blind areas can be constructed from:
- asphalt
- cobblestone
- pavers and paving slabs,
- concrete and other durable building materials.
A mixture of sand and clay, or sand and clay with the addition of fine gravel is sometimes used as the layers of the underlying and covering. The thickness of such a layer should be at least 10 cm.
How to make a blind area around the house with your own hands
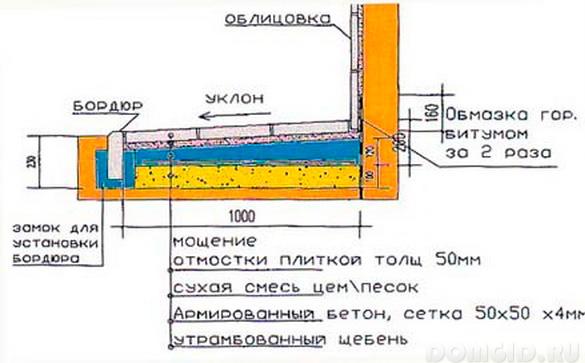
Since the main task of the blind area will be the drainage of water from the foundation, it should be planned in such a way that the side adjacent to the house is higher. The slope angle is calculated depending on the coating material. For example: during the construction of an asphalt blind area, the slope angle can be 3-5 degrees, if the blind area is made of cobblestone, it is recommended to make an angle of about 10 degrees.
To calculate the optimum width of the blind area, one should take into account the type of soil and the width of the overhang of the cornice. If the soil is sufficiently dense, then the blind area can be made wider than the eaves overhang, if the soil is planting, then the width of the blind area should be at least 1 m. In any case, the width of the blind area should not be less than 0.6 m. A water drainage tray can be a useful addition to the design , Set it around the perimeter of the blind area. It can be concrete or made from a conventional pipe sawn along. Lay it on a prepared concrete base.
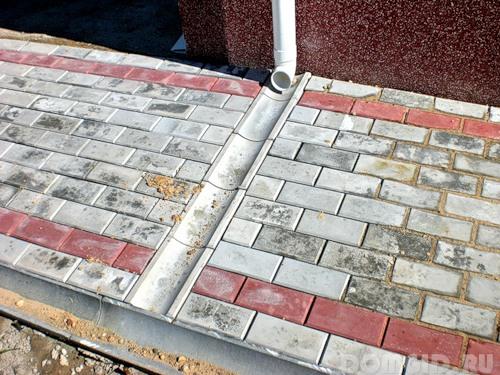
The junction between the blind area and the foundation will require special attention, it is recommended to perform a compensation seam here, its width should be from 1 to 2 cm. You can fill it with sand, but it is better to use a strip of roofing material in two additions. With the same success, you can use bitumen or special sealants.
A simpler version will be the option of waterproofing the foundation, the waterproofing will need to continue to the level of the blind area. It is not recommended to connect the base with the blind area - even in the case of slight shrinkage, the finish of the base may be damaged.
Blind area - step by step instruction
Since the quality of the blind area, designed to protect the foundation of the house, can affect the integrity of its walls and extend the life of the basement, the process of arranging it should be given attention.
We have already mentioned that the materials for the manufacture of the blind area can be different, but most often they use concrete casting on a suitably prepared base. The recommended width of the base is 0.7 m. This is enough to prevent additional moisture from getting on the base.
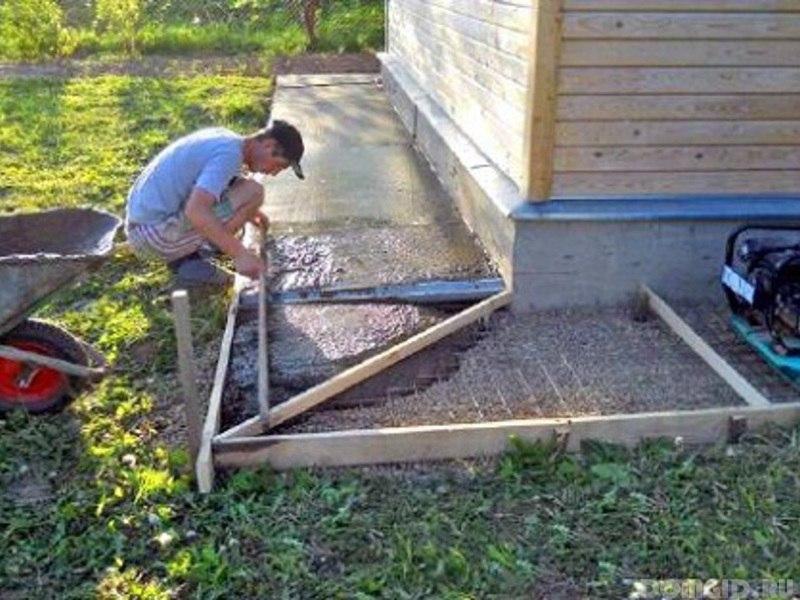
At the first stage of preparation, measure 0.7 m from the walls and install pegs around the entire perimeter of the foundation, mark the edge of the blind area with a rope. Then you can start excavation work, namely, to sample the soil, you can use it to level the site. The depth of the trench should be about 15-20 cm, this will create a good sand cushion.
They dig a trench around the entire perimeter of the house, while the specified width and depth should be observed. The surface of the foundation should be cleaned of earth and dust - this will provide a higher level of adhesion of materials when pouring concrete.
The base for the sand cushion will need to be leveled using the usual building level, at this stage of the work, an ordinary shovel can be used.
Refusing to fill the sand cushion is not recommended, it will serve as a kind of buffer that softens the effects of soil under seasonal temperature fluctuations. This is especially important in the case of construction on soils prone to expansion. Sometimes it happens that within one year the blind area of \u200b\u200bconcrete is covered with cracks, its appearance becomes unsightly.
To avoid problems of this kind should:
- Take clean sand for filling, without the addition of broken bricks and various construction debris, when the soil swells, these inclusions will be extruded onto the surface of the sand filling and can contribute to the destruction of the lower layer of the blind area.
- At the bottom of the trench, sand is covered with a layer of the required thickness and leveled.
- Next, sand is compacted, this can be done with the help of a simple device made by hand from a piece of wood.
- Tamped sand is moistened with water, the procedure is repeated several times, until a pillow of the desired density is obtained. You can verify the achievement of proper quality by standing on the sand - there should be a clear mark on the surface, the pillow should not fall under your feet.
- As for the thickness of the pillow, it should be at least 5 cm, while its surface should be below the ground by about 5-7 cm.
When building on non-porous soils, red clay is sometimes used as the lower layer of the pillow, the clay layer thickness can reach 10-15 cm. If the soil is prone to swelling, it is better to use sand to fill the pillow.
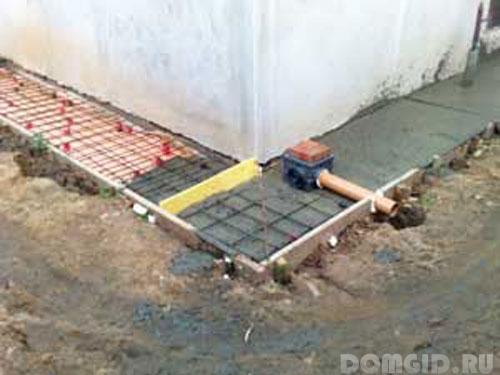
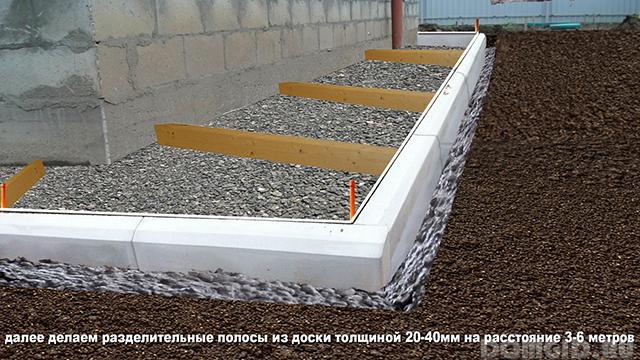
At the next stage of work, a curb will need to be set. Curb stones are installed on the outside of the blind area, strictly along the stretched cord, tracing the horizontal level of laying and checking the vertical installation of each fragment. Between the curb stones, it is recommended to leave a distance of the order of 1-1, 5 cm. When pouring, concrete will fill these gaps, when solidified, sufficiently strong bonds are formed. After installing the curb, gravel can be filled in, its layer should be approximately 3 cm.
For convenience, we divide the blind area into sections, setting at a distance impregnated with protective solutions or tarred boards. Ideally, the distance between two boards should be filled with the amount of concrete obtained from one mix of the concrete mixer.
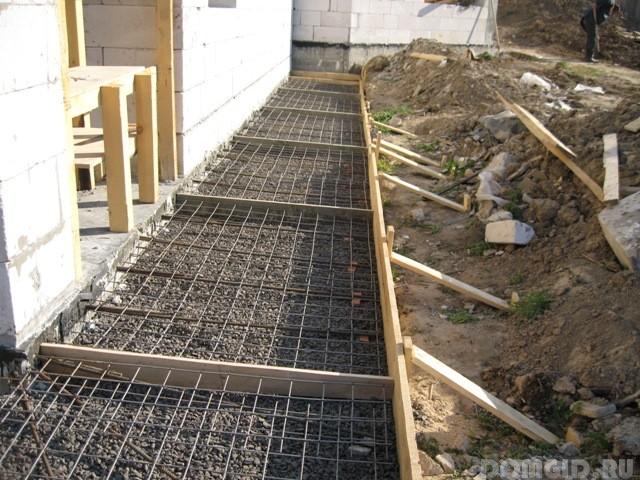
Next, a reinforcing mesh with a cell of 5 cm is laid. It should be laid so that the distance to the gravel layer is about 5 cm, and to the planned level of the concrete layer - 3 cm.
After completion of the preparatory work, you can begin to pour concrete. To prepare it, you can use the standard recipe:
- 3 parts gravel,
- 1 part cement
- 1 part sand
- water - until a creamy consistency is obtained.
Concrete should easily fill all available voids, but it is not recommended to make it too liquid, excessive moisture can cause bubbling.
More information about the construction of concrete blind area:
Some useful tips
In order to ensure uniform distribution of concrete, it is recommended to periodically tap on wooden lintels. After pouring the section with concrete, it will be necessary to level its surface with either a wide spatula or a plaster rule. Do not forget that the slope of the concrete surface in the direction of the curb should be no less than 5 degrees.
Experts do not recommend making the concrete blind area continuous, the threat of its destruction after the first wintering will be very high. It will be correct after every 2, 5 - 3 m to install expansion joints, they should be installed across the blind area. As seams, you can use rails processed with melted bitumen. Set them on the edge.
To increase moisture resistance, the surface of the concrete is subjected to ironing. The process consists in filling the surface of concrete that has not yet hardened with a layer of cement and smoothing the surface with a metal trowel.
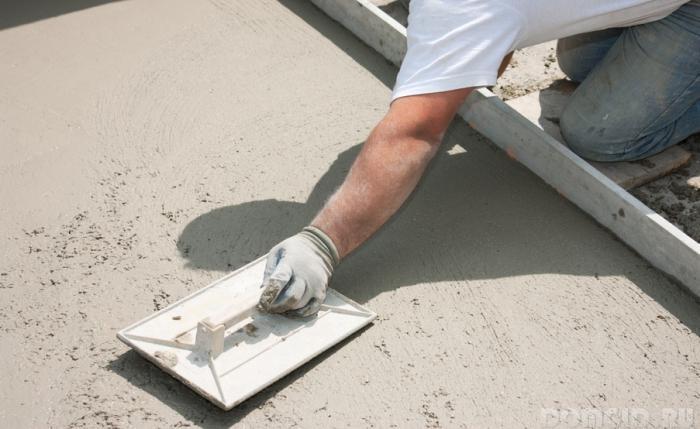
Next, the entire blind area is covered with a cloth, moistened and left for a week. During this period, hardening concrete is poured twice a day from a garden watering can, the fabric should be moist all the time.
As you can see, casting the blind area with concrete is not particularly difficult, it is quite possible to do all the work yourself.
Features of the construction of the cobblestone pavement
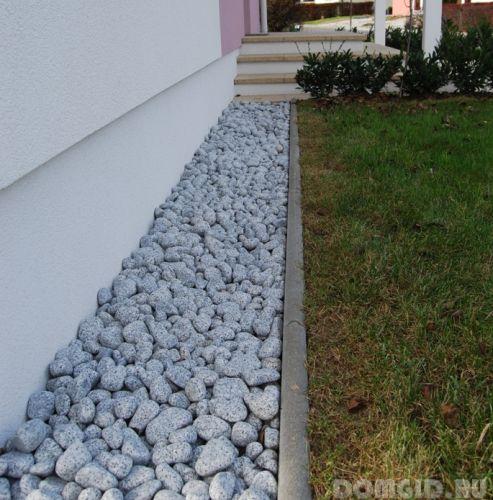
After digging the trench, the creation of an underlying sand layer will also be required, its thickness can be from 10 to 20 cm. When using crushed stone of a fine fraction, the thickness of the underlying layer can be reduced to 3-5 cm. The recommended thickness of the cobblestone is within 10 cm, to fill the space, which will remain between separate fragments of the blind area will need to be covered with sand.
The blind area from paving slabs, what are its advantages
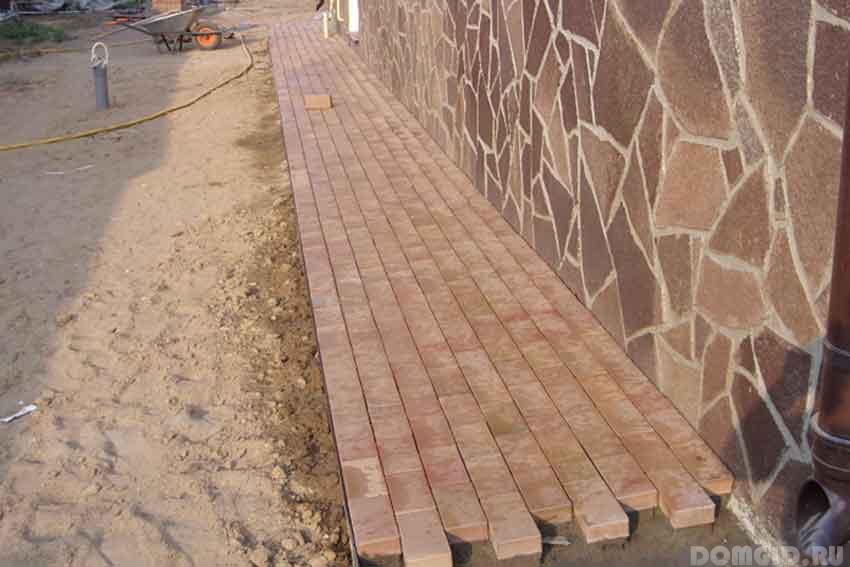
The basis for the blind area from paving slabs can also serve as a sand cushion built from small gravel. You can also use clean sand to fill the gaps between the tiles.
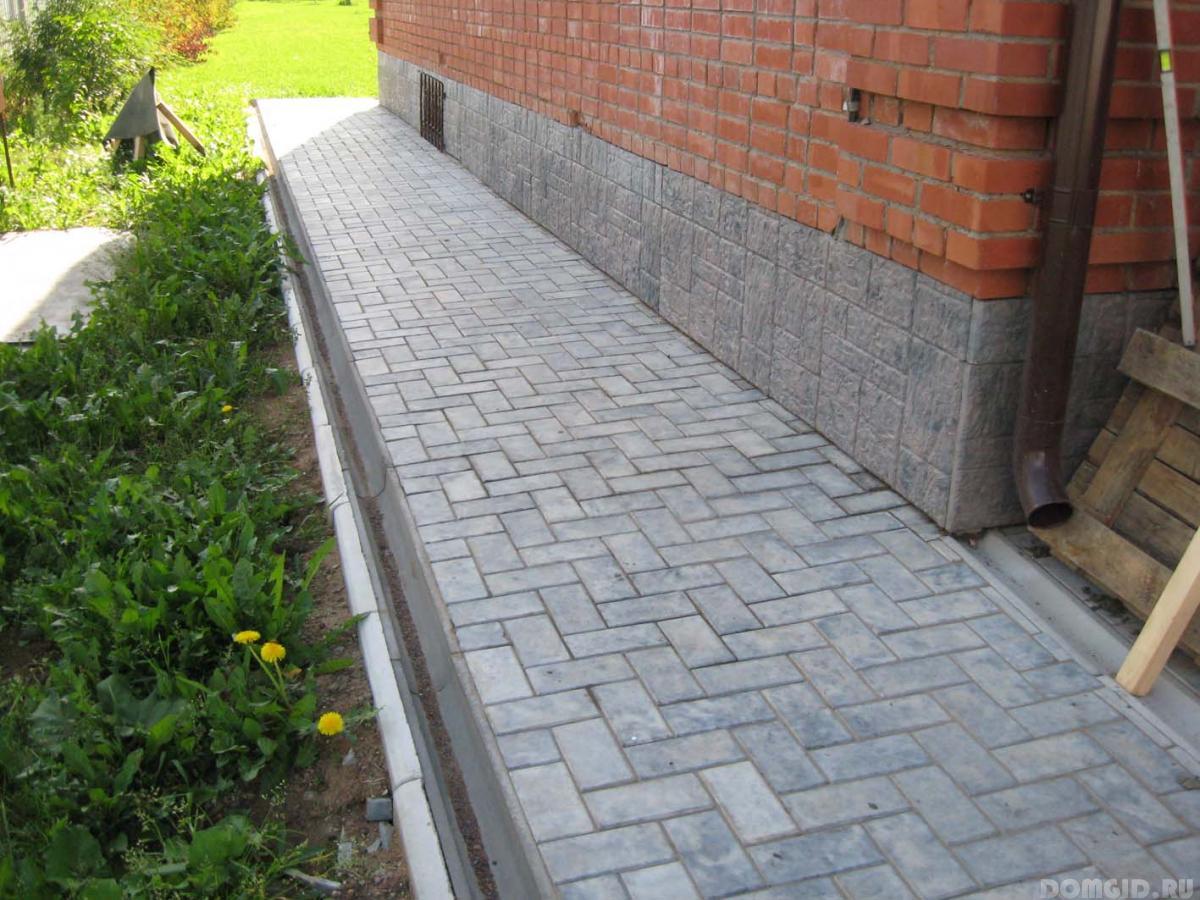
In order for the blind area to be neat, and its installation easier, you should design a width that is a multiple of the width of the tile. In this case, you do not have to violate the integrity of the tiles and cut each of them.
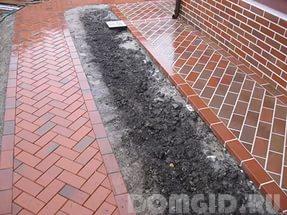
Paving slabs, if evaluated in terms of practicality, is the optimal material for the blind area:
- it fits quickly, does not require arrangement of an additional layer of the base,
- its service life is decades
- if necessary, it is easy to replace each of the damaged fragments,
- the quality of the laid tiles is quite attractive.
How to build a blind area from paving slabs:
