Search
Login
Recommended
How to build a birdhouse so that birds live in it
Have you noticed that not every birdhouse has birds? We asked ourselves this question and found out how many mistakes can be made when building a bird house and we want to convey this knowledge to you.
Content
- Where did the first bird houses in Russia come from
- Useful tips for future builders video
- How to hang a birdhouse
- How to protect a bird house from a cat
- How many bird houses can be hung on one site
- Preparing a bird house to move
- We build a nesting box with a do-it-yourself chain saw in stages
Where did the first bird houses in Russia come from
The first bird houses in Russia appeared during the reign of Tsar Peter I.
It is well known that the great Tsar Peter was very interested in everything unusual.
In Europe, he looked at how Europeans fed birds and decided to implement this idea in Russia.
At first, people were forced to make birdhouses in an orderly manner, this innovation gradually took root, since people liked the gentle twittering of birds, it made people happy to watch the bustle of birds around the offspring.
It would seem pampering, but such a neighborhood has brought positive fruits for the garden, since the birds perfectly destroyed insect pests.
But in order for the birds to settle on the site, it is necessary to take care of the house for birds in advance.

Currently, during the season you can purchase any house of your choice.
![]()
They offer haute couture villas for every taste.
But, it is much more interesting to make a bird house with children.
Useful tips for future builders
The bird house does not have to be big; if the house is big, then the bird can lay too many eggs and parents will not be able to feed such a large family.
The offspring will grow weak, and in late summer - early autumn birds will fly to warm countries, and a weak bird will not reach its destination.
In addition to the question of feeding the chicks, there is an acute question of the weak immunity of the offspring, since any sickness, such as bird flu, sticks to weak chicks.
And if the house is correct, then only two or three chicks will grow in a cramped house, but these will be strong and healthy birds.

That's why birdhouses are built about 30-35 cm high. The bottom usually has a square shape with a size of 16x16 cm, the bird’s entry hole is 1 \\ 4 of the total height, 4-5 cm in diameter, the roof has a mandatory slope, which prevents water from entering the birdhouse.
How to hang a birdhouse
The house can be hung on any deciduous tree, it can be strictly upright, or you can with a slight slope forward.
The hole for the entry of birds must be directed to the south, east or southeast - thus protecting against the cold wind from the north.
You can place a bird house at a height of at least three meters from the ground.

Pity your living tree, so do not nail the birdhouse with nails, but rather tie it with wire.
In the absence of a tall tree on the site, the birdhouse can be fixed on a strong three-meter pole.
How to protect a bird house from a cat
It is well known that cats are excellent feathered hunters.

A cat is a predator, and at the same time a very adroit, bold and jumping animal, capable of catching a bird on the fly.
Your task is to protect the bird house from the cat.
To prevent the cat from reaching the birdhouse - hang it very high on the tree or around the tree trunk fasten (if possible) an apron of metal or plywood 30-40 cm wide, parallel to the ground.
And if you hung a birdhouse on a pole, then fix below the birdhouse, in the middle of the pole, a plywood circle with a diameter of 45-50 cm. - Cats are not able to overcome such an obstacle.
How many bird houses can be hung on one site
If you want to attract starlings to your plot, then for these birds you need to have one birdhouse for 20-25 acres.
If there are a lot of birdhouses, the birds will begin to compete with each other and as a result they can all leave the territory.
Don't especially expect starlings to protect your garden from pests.
Starlings are cute, funny birds, they sing wonderfully, but in July everyone will be together and fly away to the fields, since there is a lot of food for them and they will feed there until late autumn, before departure.

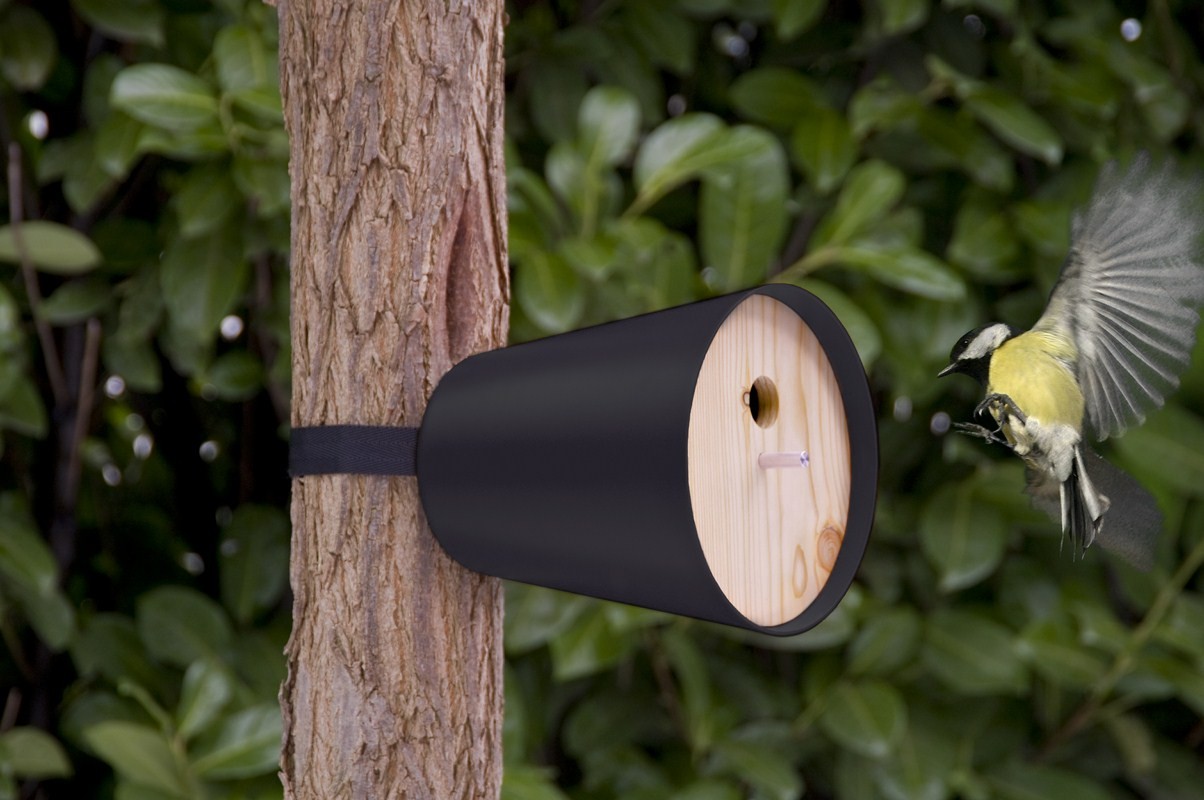
Blue Tit and Great Tit are birds with a pugnacious character and therefore there should not be many houses for them.
There can be quite a lot of houses for wagtails and flycatchers, as these birds are excellent pest control assistants.
Pied flycatcher.
Tits, cyanistes, wagtails during the summer have time to grow and feed 2-3 broods, for so many chicks it takes a lot of food, which means your garden is always under control.
Preparing a bird house to move
Autumn and winter are time for birdhouse care.
Houses need to be removed, feathers, twigs, all food waste, i.e. remove all residues to prevent the development of parasites.
You can process the houses from inside with boiling water or a solution of potassium permanganate.
If there are children in the family, carry out all the work from building the house to caring for it with them.
Such works bring the family together well and pleasant memories remain in children's memory for a long time.
We build a nesting box with a do-it-yourself chain saw in stages

Let's build an exclusive house-duplyanka, and for this it is necessary:
-
chain saw, better model with low impact;
-
goats for sawing logs;
-
wood drill with a feather drill;
-
hammer;
-
nails 70-80 mm;
-
ruler;
-
round log, about 80-100 cm long, not coniferous.
Working process
First stage. Firmly fix the round timber on the goats.
Second phase. Remove the core from the round timber, for this, cut parallel to the left and right from the end of the round to a depth of about 20 cm. Then turn the round round on the goats 90 * and repeat the same steps.

For such work it is necessary to use a familiar saw, i.e. have chain saw skills. Follow all safety precautions, as there is an increased risk of kickback or kickback during such work.
The third stage. We got the inside of the house, from the base.
Now you need to separate the house from the main round timber. To do this, at a distance of 30 cm from the bottom, it is necessary to make a cut at an angle to tilt the roof.
The fourth stage. Saw a saw blade of wood 3 cm thick. To do this, make a vertical straight cut. This disc is the bottom of a bird house.
The fifth stage. We are faced with the task of cutting a roof board. To do this, from the remains of the round timber, using two longitudinal cuts, from the central part of the round timber, we get a 3 cm thick board.
The length of the board should be about 3-4 cm. More than the diameter of the house. Roof pads are designed to prevent rain from entering the bird entry hole.
Sixth stage. Using a feather drill, make a hole for entry. If you want to populate the starlings, the diameter of the entry hole should be 45mm.
If you are preparing a house for lazarevka, the hole is 28 mm., For the great tit - 32 mm., For the wagtail - 40 mm.
Seventh stage. Fasten the bottom of the birdhouse to the hull with nails.
The eighth stage. Nail the roof. The house is ready! We are waiting for a housewarming party.
If you want to refine a birdhouse, you can paint it with gray or red water-based paint.
Remember that birds do not like green.
Do not use stains, nitro paints, varnish and impregnation.
Birds love only environmentally friendly material.
The same house-hut can be built with an ax - this is the fastest house.
In the center of the round log we split into four parts.
We remove sharp corners with an ax.
We fasten all four parts together, wire the bottom, the roof, make a hole for entry - the house is ready.


