


Do-it-yourself swing made of wood: material, tools. Garden swing assembly.

The installation of such a swing, which can be placed not only on a large veranda or terrace, but also on the garden site, will make the site much more attractive and modern. Among other things, such a swing will be a real gift for all family members and a surprise for guests.
Content:
When choosing a swing design, it is necessary to be guided by the fact that they must be comfortable, beautiful, made of high-quality material, especially since the swing must be strong and durable. You can buy ready-made garden swings, the price of which largely depends on the material, comfort level, etc., but if you want your house and land to have individuality, make a wooden swing, for example, tea swing.
Materials for execution
The tree itself, a very pleasant material, working with it can bring a lot of pleasure. But remember, it’s difficult to make a good thing from bad raw materials, so try to use only good quality material.

In furniture and carpentry, a long list of tree species such as walnut and oak is known. mahogany, polysander.

All these are expensive, valuable species of trees. But fortunately, the most popular and accessible types of wood for us: pine and spruce.

Briefly give information about the materials that you have to use.
tree for a swing
Firstly, it is lumber.
They are obtained by longitudinal sawing of logs. Lumber, the width of which is greater than double thickness, is called boards, and those that are already - bars.
Thinner bars are called slats, and those whose width and thickness exceeds 100 mm. Are called bars.
In order for the lumber to be well processed, cleanly planed and firmly glued, they must be well dried. You have to dry them yourself.
When purchasing lumber, carefully select boards. Discard the board with external defects (chips, cracks, bends, blue, etc.).

On the spot, after the delivery of lumber, boards or whetstones are stacked in rows at a distance of 20-25 cm from each other, they are laid across, at least a meter later, rails of the same thickness.
The second row with gaskets is laid on top, the gaskets of each row should be one above the other, etc.
In order for the upper boards to be pressed and less deformed, some load must be put on the upper layer.
Lumber can be dried using various heaters or by the stove, not forgetting that the fire safety rules are observed.
Freshly sawn boards dry quickly, but at the same time, they twist and crack, so during natural drying, it is better to dry them in a barn or under a canopy for about 10-12 months.
glue
The most traditional is bone or wood glue. It is usually sold in the form of granules. Joiner's glue cannot be cooked on direct fire, it is cooked in a water bath.
To prepare such an adhesive, you must put the dishes with it in a saucepan with water. Initially, the granules are soaked in water, after 10-12 hours, when the glue swells, it is heated, but not brought to a boil in a steam bath.
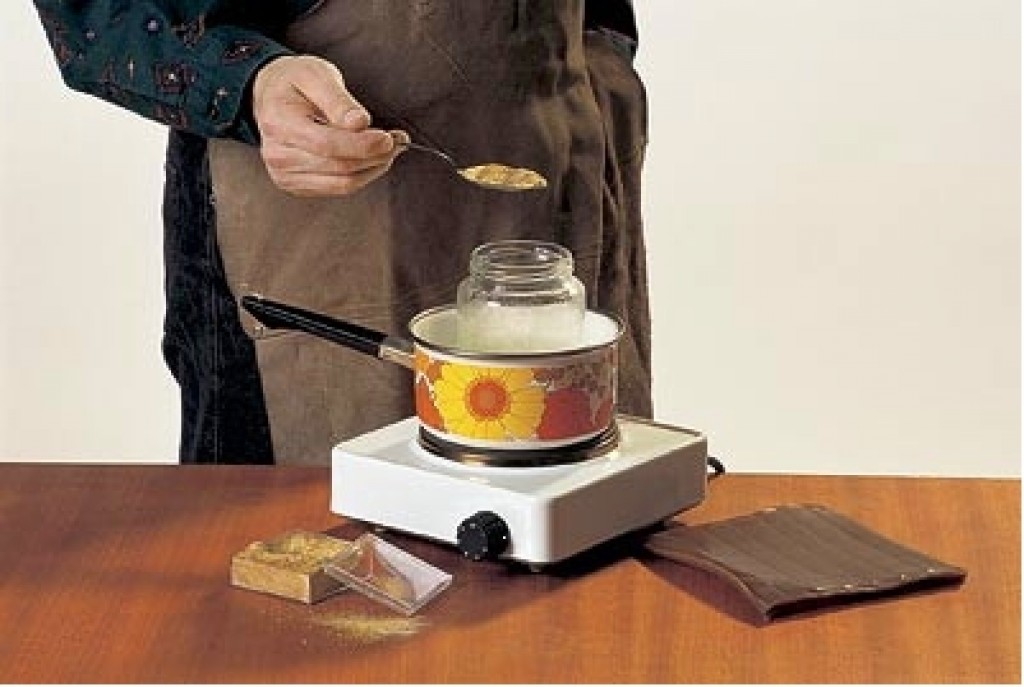
The quality of gluing wood depends on the thickness of the glue, so it is important to observe the proportions (one and a half parts of water are taken for one weight part of dry glue).
If you want the adhesive to be reliable, use an adhesive with a temperature of 65-70 degrees Celsius.
Properly welded glue drains from the scapula with a slow translucent trickle, if the trickle is too thick, dilute the glue with boiling water.
Do not spread glue with a thick layer.
Classic wood glue is fragrant and pleasant, but it’s harder to work with than white PVA-M glue.
The viscosity of this adhesive meets the requirements for gluing wood.
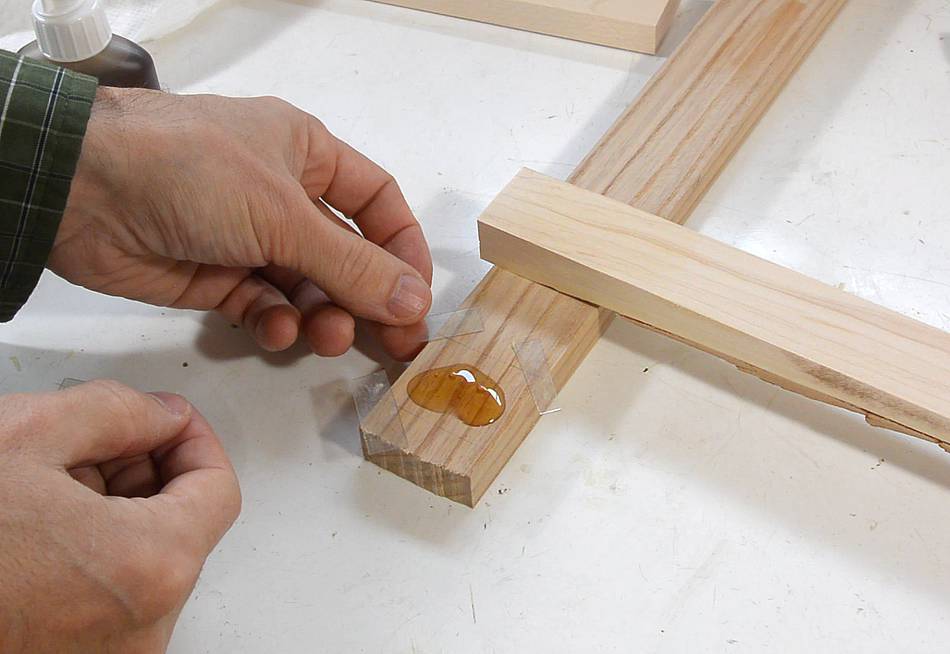
When dried, the adhesive polymerizes, after which it practically does not lend itself to moisture, in contrast to carpentry glue.
In addition, when dried, the glue becomes transparent, so excess glue, in the interface, is almost invisible.

instruments
In work, the tool is of paramount importance. In order for the work to look neat, to be done quickly and with high quality - the tool must be excellent, it must be sharpened in a timely manner.
Saws.
The tree has to be cut at different angles - longitudinally, crosswise, at an obtuse or acute angle to the fibers.
In this regard, saws are also divided: transverse, with a tooth in the form of an isosceles triangle and with a mixed tooth - they are equally good to saw in any direction.
Narrow saws are designed for cutting along a curve.

For sawing spikes, wide saws with a fine tooth and a hard blade are used.
Such a saw does not walk, the cut is more accurate.
Plane.
When performing carpentry, it is necessary to have a shaped planer or electric, you can purchase a universal planer.
Bit.
It is used for hollowing out various grooves and holes necessary for joining wooden parts. Chisels are from 2 to 50 mm. the width.

They hit them with a mallet - a wooden mallet.
Drill (electric drill).
For easy and quick hole making, it needs to be pre-drilled and then the edges aligned with a chisel. It’s good to have a drill for this.
Countersink.

Serves for drowning screw heads, usually a conical cutter on a wooden handle, it can also be inserted into the drill chuck.
Files.
Serve for the final processing of a wooden surface.
There are flat and semicircular with a rough notch - rasps.
At the end of processing, use small files on wood.
To grind the product, you must have a glass skin, coarser at the beginning and the thinnest for processing under the varnish.
Reysmus.

Designed to draw lines parallel to the edge of wooden parts when marking it, both in width and in thickness.
Preparing swing elements
After you have prepared all of the following swing elements, namely:
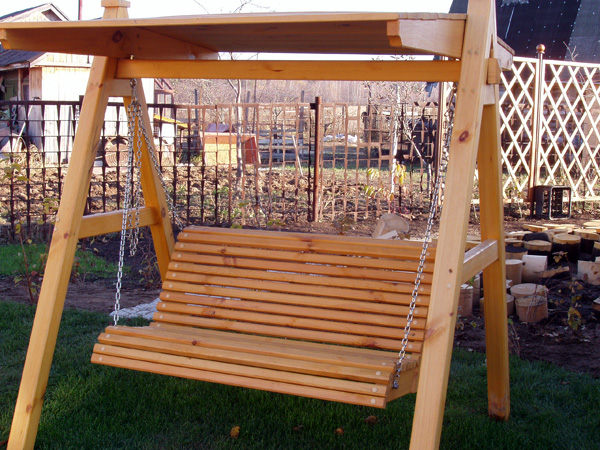
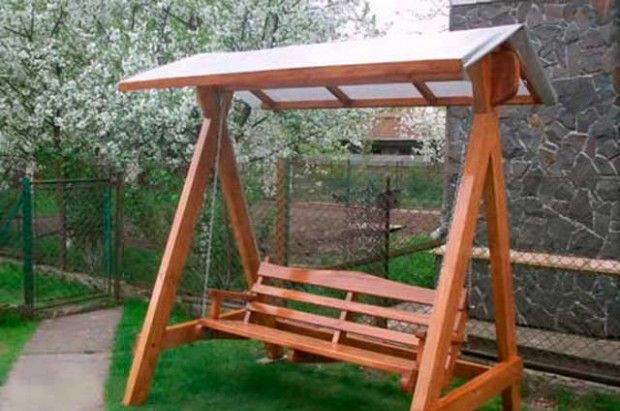
- four support columns with a diameter of 100-120 mm., its cross section can be round or rectangular, the length of these columns depends on the height of the swing 240-250 cm. These columns are inclined supports for the swing;
- blanks for two triangles, consisting of bars of 100 mm., the lengths of these blanks, depending on the size of the roof, at your discretion;
- four bars 100 mm., 2 meters long for fastening benches and a swing floor;
- floorboard blanks;
- blanks for two wooden benches and a table, all elements of the swing must be treated with a protective compound for wood.
Swing assembly progress
1. The canopy itself is supported by four inclined columns with a diameter of 100-120 mm. Their cross section can be round or rectangular.

2. Inclined supports are installed on concrete slabs buried 10-15 cm deep in the ground. Before laying the slab, it is necessary to create a sand cushion 15 cm thick and compact it well.
3. Two gable roofs are supported by two triangles. This is a rigid system of two inclined bars and a horizontal base. Each triangle is firmly fixed to two inclined supports carrying a rocking-canopy.
4. roofing material - thin boards with a selected quarter, nailed to the ridge and two side bars.
5. The rocking chair itself with benches and a table is attached to the main beam - it can be either a log of 100-120 mm. Or a steel pipe. Through holes are drilled in it, bushings are inserted, then bolts connect the vertical bars of the bearing structure of the rocking chair. In order for the swing to occur in the same plane, fastening to the rocking chair at the bottom and at the top should be done through the sleeve.
6. The space between the rocking floor and the ground should be at least 12-15 cm.
