Search
Login
Beehive for bees, how to make a beehive yourself yourself, make a beehive with your own hands
Every beekeeper knows that shelters for wild bees are natural shelters, which, for example, can be a hollow tree. But if you decide to engage in the cultivation of these hard-working insects, then you will have to make every effort to ensure satisfactory working and resting conditions. And this presents a number of difficulties. Of course, there is no shortage of such information, in the beekeeping books the whole process of organizing the hive is described in detail, but this article is intended to convey to the reader as simple and structured as possible all the information necessary for the proper selection and installation of the hive.
Content
Types of hives
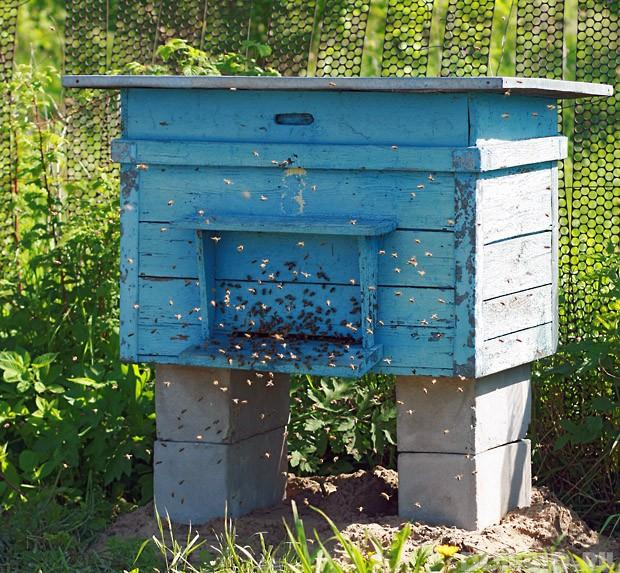
Before embarking on the construction of a hive for bees, you must clearly understand what design of the hive you decided to build. There are many different types of houses for bees, each of which has its own pros and cons. A detailed description of each type is not the purpose of this article, since this information is available in any sources for beekeeping. In this regard, it should be noted that the main types of hives are vertical (riser) and horizontal (lounger).

vertical hive
The vertical one is a two- or three-tier structure containing up to ten frames in each tier. An increase in the volume of the structure is achieved by installing additional buildings or stores.

horizontal hive
Horizontal hives resemble elongated horizontal crates in shape, which can be increased by additional installation of new buildings on the side.

How to make a beehive with your own hands?
So, it's time to answer the questions: How to make a beehive with your own hands? and what is needed for this? Let's start from the very beginning.
If you are determined to please the bee dynasty with new comfortable apartments, you should clearly know that the hive is designed to provide:
Firstly, reliable protection from temperature extremes and any changes in meteorological conditions, since bees are extremely whimsical insects.
Secondly, the dwelling should be equipped with the prospect of side and ceiling types of insulation, which also protects the bees from changes in the meteorological situation, namely, in winter from excessively low and in summer from excessively high temperatures.
Thirdly, the hive should be spacious and provide for a possible expansion of the structure, taking into account the increase in the number of members of the bee family, as well as the supply of food resources.

And finally, each beekeeper should create a hive that is convenient in all respects not only for bees, but also for its own service. The hive must be strong and wear-resistant, it must be well ventilated, as well as having strong mountings and interchangeable parts, which makes the structure convenient in case of movement or maintenance.
the materials we need
For the manufacture of hives, the following materials will be required: boards of various widths made of soft wood. They must be well dried and free from excessive roughness and roughness. Choose boards even, with a width, half a centimeter wider than the walls of the hive. This is necessary for stock in case of stripping parts.
Also, it is necessary to prepare nails of the proper diameter, which will not violate the integrity of the material. We must not forget that to preserve the optimal appearance, the hive is painted after two to three years.


beehive sizes
Determining the size of the hive is a crucial moment, as this is the basic rule for the construction of hives. There are universal sizes suitable for hives of any design.
1. The distance between the mediastinum of two adjacent frames is 37.5 mm.
2. Aisles for bees, called streets of 12.5 mm. If you decide to install a second housing, the distance between the upper bars of the nesting frames and the lower trims should be 10 mm.
4. The distance from the front and rear walls of the hive to the side strips of the frames is 7.5 mm.
5. Between the lower level of the nesting frame and the bottom of 20 mm.
If you have learned the basic dimensions of the hive, then you can easily cope with the calculations of additional values \u200b\u200bthat will be required in the process of preparing the hive.
components of the hive
Everyone who decides to make a hive with their own hands needs to know that its structure includes the following components:

manufacturing technique
For the manufacture of the roof you will need boards with a width of 20 mm or plywood, which is used in two layers. First of all, you need to take care of the binding. Its dimensions are 455 * 455 mm. For its manufacture, boards with a width of 15 cm will be required. The perimeter of the strapping is supplemented by trims that prevent the cover from slipping. A lid coated with oil paint is installed on top.

The canvas is not a mandatory element of the hive and is used for maintenance. It is a piece of burlap used to close the holes formed in the lid.
The dimensions of the insulation pad should not greatly exceed the size of the hive and are 455 * 455 mm. It is made in the form of a pillow, the filler for which is moss or dry grass.

The main constructive solution for the bottom is the manufacture in the form of a simple bottom, having an indent from the border of the frame by 20 mm. It should correspond to the size of the hive and be nailed to the hive. There are designs in which the bottom remains loose.
For the manufacture of walls, boards with a size of 20 mm are used. They must be tightly fitted at all distances and tightly fastened with tongues.

Another indispensable element of bee apartments is the diaphragm. It is designed to separate the bee's nest from the empty space. To make it, you will need ten millimeter plywood, to which the sides are attached. It should be a mobile element of the hive. Which is easily removed and inserted.

The frames are made of slats, the material for which is birch or aspen.

hive assembly
Before collecting the hive, it is necessary to prepare four walls, the dimensions and drawings of which are presented below. Then the front wall is connected to the side, and then the back wall of the hive is attached. The next step is to suspend two nesting frames to the side surfaces of the hive. After that, the floor is attached to the bottom edge, or a mesh is inserted to replace it.

Do not forget about the notch, which is cut out on the front surface of the hive. The beaten hive is set on the floor. A pillow and an insulating canvas are placed on top, which will maintain the desired temperature in the hive, and is covered with a lid.

Do-it-yourself polystyrene beehive
If you decide to use a polystyrene beehive, then you should familiarize yourself with its pros and cons. Of course there are more pluses, but there are also disadvantages. The advantages are good thermal insulation, lightness, fairly simple manufacture. The disadvantages are associated with the tendency of the walls of the hive to damage, as well as with the penetration of light into the cracks between the walls. All the disadvantages can be compensated by good maintainability and low manufacturing costs.


