Search
Login
Installing a glass apron in the kitchen, how to do it yourself
The Soviet past makes us distrust and prejudice about new developments in the construction industry. And the high cost of trendy building materials scares. Meanwhile, along with really not very necessary and expensive fashionable little things, practical and very beautiful decoration elements appear on our arsenal, the existence of which a few years ago we had no idea. These things can be safely attributed to the protective apron installed in the kitchen. In city apartments, this is already a familiar thing, but people who spend a lot of time in the country and seek to create a stylish interior of a country house should definitely look at this option for decorating a country kitchen, especially since it’s not difficult to make a glass apron with your own hands.
Content
- What is a glass kitchen apron video
- Glass Apron Material Requirements
- Glass apron with photo printing
- Making a glass apron video
- Mounting the glass apron video
- Image Options
What is a glass kitchen apron

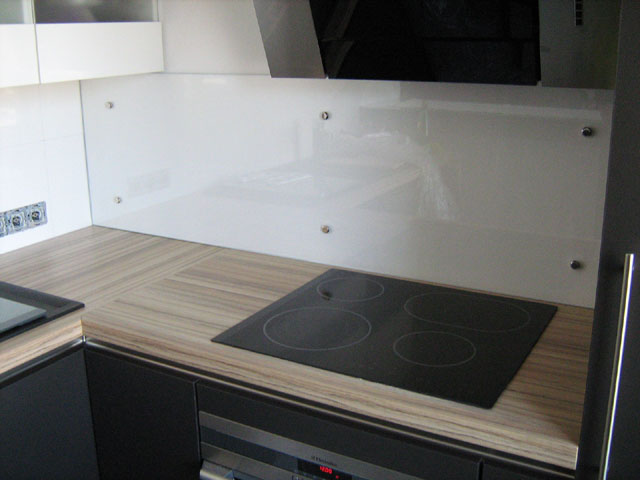
A kitchen apron is a decorative surface finish between a countertop and hinged shelves.
This working area in the kitchen is most susceptible to pollution and its protection requires the closest attention.
We are used to the fact that washable wallpaper is usually glued to this surface or it is laid out with tiles.
With wallpaper, of course, it's simple, but it's so impractical that it makes you think about a more serious wall defense.
Tile helps here, however, its laying requires serious qualifications and is characterized by high labor costs.
In addition, a tiled apron does not differ in a variety of compositional and color solutions.
And the choice of modern owners increasingly stops at the skinned apron of the skin (skinned is the generalized name for a decorative vertical panel mounted on the surface).
It is quite simple to install, a drawing can be applied to it and, importantly, the apron is easy to dismantle.
Glass Apron Material Requirements
For glass apron, any glass with a thickness of at least 6 millimeters is suitable.
It is recommended to install tempered glass that can withstand high temperatures near the cooking surfaces (stove, oven).
The edges of the glass panels are necessarily ground so that the joints are less noticeable (this operation is performed in any glass workshop).
Wall murals are bought ordinary (economical option) or ordered in printing houses in the form of a self-adhesive film (more expensive option).
We also need an opaque substrate, which can also be ordered at the printing house.
When choosing a film, please note that the picture will be mirrored.
Glass apron with photo printing
The use of a protective glass apron for the kitchen with multi-color photo printing on the back of the glass can be quite popular and certainly very effective.
This option gives a variety of images, only it is necessary to place a picture with a high resolution (at least 3,000 pixels horizontally).
The image is applied to the back of the glass apron and covered with a special protective enamel.

This method of application and processing will make the drawing durable, not afraid of moisture and can withstand high temperatures in the area of \u200b\u200bcooking surfaces.
Making a glass apron
If you decide to independently make a glass apron in the kitchen, you must act clearly according to the following algorithm:
- perfectly aligns the wall where the glass will be mounted to avoid cracking when clamped
- schematically, the entire surface is divided into several parts (it must be remembered that tempered glass must be installed near the stove and oven)
- measured the distance from the bottom edge of the hinged shelf to the top edge of the countertop with a tolerance of 5 mm
- glass is ordered in the glass workshop (with mandatory grinding of the edges)
- if the background is photowall-paper, they are glued to the wall, if photo printing is used, it is glued to the glass with a mirror using a substrate
Mounting the glass apron
Installation of a glass apron is carried out only after the complete installation of kitchen furniture and built-in appliances.
The first elements of the apron are installed above the stove (and under the hood, for which a U-shaped aluminum profile is screwed onto the wall, into which glass will then be inserted).
Then, L-shaped profiles are screwed to the wall along the entire lower edge of the cabinets, to which the remaining segments of the apron are attached.
From below they are pressed and fixed with a plinth.
Instead of profiles for fastening, you can also use special fastening glass elements.

When drilling holes in the glass, the following requirements must be observed:
- the minimum diameter of the hole in the kitchen apron is 8 mm
- minimum rounding radius 8 mm
- the minimum distance between the edges of the holes is 10 mm
- the minimum distance from the edge of the glass to the edge of the hole is 10 mm
- minimum size with equal distance for mounting hole - 25 mm
- the minimum distance from the hole to the outer edge / outlet / cutout is 12 mm
- the minimum distance from the cutout under the outlet to the edge of the glass is 30mm.
The video shows how to cut holes in the glass.
Image Options
A glass apron made of ordinary transparent glass will perform only one function; it will protect the kitchen surface from dirt.
But do not abandon the aesthetic component of this finishing element.
Surely you will want to experiment with the color scheme both on the glass itself and on the drawings, if a glass apron with photo printing is mounted.
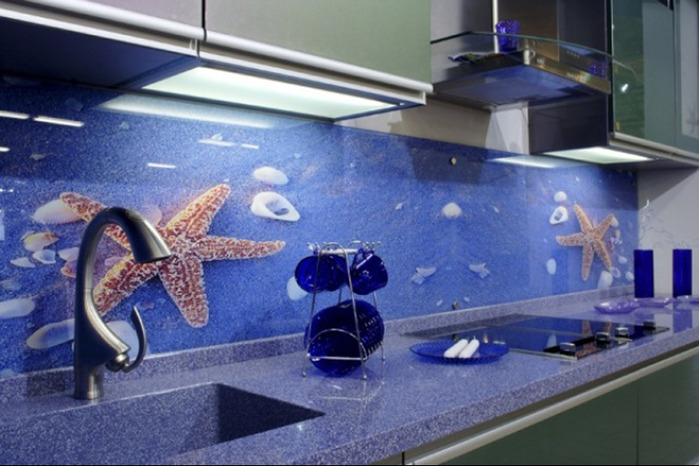
The choice here is truly unlimited, we will show only a few photos of glass aprons, and the fantasy will tell you which one you need.
Monochrome

Marine theme
Flowers

Image of different heights
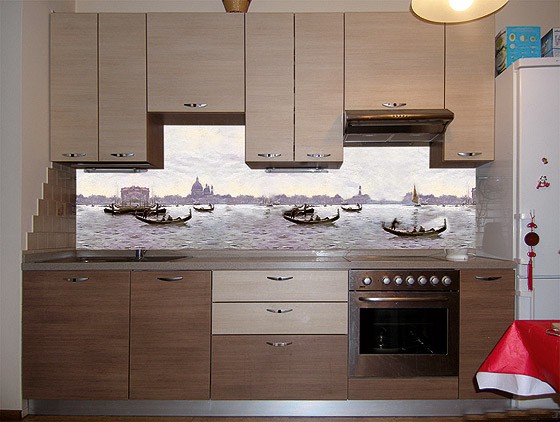
The choice of composition is limited only by your imagination and the size of the surface to be protected. It is important that the glass apron in the kitchen will be a unique and practical solution for the modern summer resident.
