Search
Login
How to insulate the roof of the bath? Practical advice on how to do this correctly with different types of ceilings - floor, hem or panel - will help you with this.
In order for the bath rooms to keep warm for a long time and quickly heat up, it is necessary to correctly insulate the entire structure, including the roof and ceiling. In this article we will tell you: how to properly insulate the roof of the bath, what materials should be preferred and how to properly conduct the insulation of different types of ceilings.
Content
- How to insulate the roof of the bath video video
- Choose a heater for the ceiling of the bath video
- Panel ceiling
- Floor ceiling
- False ceiling
- Advantages and disadvantages of different ceilings
- The installation of the false ceiling in the bath
How to insulate the roof of the bath
In order for the bathhouse to please us with long years of service, to be warm and comfortable, we need to be very serious about all stages of construction. Especially when it comes to hydro and vapor barrier of the roof, as well as its insulation.

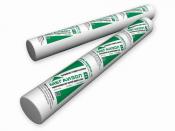
As a rule, membrane films are used to equip hydro- and vapor barrier. To install the hydrobarrier, the membrane film should be laid immediately on the rafters before installing the crate. For a vapor barrier, a membrane film is placed between the ceiling insulation and the sewing. At the same time, it is imperative to remember that protective films are stacked only with an overlap of 15-20 centimeters and without tension. This will help to avoid unwanted tearing of the protective material due to its narrowing or expansion due to temperature changes.
Part 1:
Part 2:
As for the insulation, it is recommended to use such natural material as mineral wool for both the ceiling and the roof of the bath. The insulation is 10 centimeters thick and fits into the roofing pie. At the same time, it should consist of two rows of mineral wool sequentially staggered.
Also, foam insulation can be used to insulate the roof, but it is not recommended to use this material specifically for the bath due to the toxic fumes of phenol released by it.
Choose a heater for the ceiling of the bath

As in the case with the roof, mineral wool is most often used to warm the ceiling of the bath. In addition, jute, glass wool, basalt fiber, expanded clay, a mixture of clay with sawdust and even growing aerated concrete can be used for this purpose. Expanded polystyrene, despite all the assurances of manufacturers about environmental friendliness and safety, experts still do not recommend using it.
Each of the heaters proposed above has its undeniable advantages and disadvantages. For example, basalt fiber when wet completely loses its physical properties, and expanded clay insulation requires the arrangement of an additional layer of hydro- and vapor barrier. And warming with a mixture of clay and sawdust, tested by our grandfathers, despite the cheapness, will require a lot of time and a high level of skill from the builders.
In general, when choosing a material for insulating the ceiling of a bath, it is necessary to pay attention to such properties and advantages of a heat insulator as:
- environmental friendliness;
- ease of use;
- fire resistance;
- good noise insulation properties;
- life time
Panel ceiling

The panel ceiling is a structure of pre-made panels. Such a shield consists of supporting bars (A), the inner lining of the ceiling (B) and the outer cover (E) of the floor of the attic. Between the inner lining and the outer covering, there is waterproofing (D) from the attic side, thermal insulation material (G) and a vapor barrier layer (B). Between the shields, it is necessary to lay the seal (G) from felt with a gasket made of polyethylene or foil. You can also use double-sided foil insulation.
This type of ceiling has both its pros and cons. The main disadvantages of panel ceilings are the complexity of installation associated with the need to lay a seal between the panels and, in fact, the very weight of the finished panel. Since raising a finished shield is beyond the power of one person, quite often an empty box is first installed and only then it is stuffed with everything necessary.

Note that if a beam with a section of 50x100 mm or more was used to create the frame for the panel ceiling panels, then they can be laid as a ceiling and there is no need to arrange auxiliary supports.
Floor ceiling

As the name implies, the floor ceiling is arranged by flooring the ceiling boards (A), on top of which vapor barrier (B) and insulation (C) are laid. In the event that you decide to use bulk materials for the insulation of the ceiling, you need to take care of special guardrails (G), which are arranged around the entire perimeter of the attic.

False ceiling

To install the false ceiling, you must first install the supporting frame. After the frame is ready, edged or grooved boards of 30-40 millimeters thick (B) are mounted on the ceiling beams (A). Vapor barrier (B), insulation (G) and waterproofing material (E) are laid on top of the boards. From above, all this is sheathed with boards (E), which will subsequently serve as the floor of our attic space.
Advantages and disadvantages of different ceilings
During the construction of the bath, many experts prefer a false ceiling and there are a number of reasons for this.
Firstly, unlike a ceiling, a hem is perfect for rooms with a span of more than 2.5 meters for laying boards.
Secondly, unlike other types of ceilings, the arrangement of the baseboard requires much less time and effort.
As for the direct ceiling, it is recommended to arrange it in small saunas without an attic, since in this case there will be no plank flooring from the attic, and the supporting stiffness will be clearly not enough to support human weight.
Arranging a panel ceiling will take much more time and effort than installing a false ceiling. This is due to the need to create additional steam and heat insulation between the panels, and to the difficulties of installing heavy panels. But when creating a panel ceiling, you can use the lumber remaining during the construction, which will save significantly.
The installation of the false ceiling in the bath

Before proceeding with the installation of the ceiling shield, it is necessary to take care of the opening for the future chimney and only then can the vapor barrier material be attached to the beams. As a rule, for vapor barrier use a plastic film that is attached to the beams using a construction stapler. Moreover, before the installation of the vapor barrier layer, the ends of the beams are treated with an antiseptic two to three times. The vapor barrier material itself is laid with an inlet of 15-20 centimeters around the entire perimeter of the wall.

After the vapor barrier layer is already attached to the beams of the ceiling, you can proceed with the installation of the ceiling panel. For these purposes, we need boards with a groove on one side and a spike on the other. The starting board with the groove is attached with the smooth side to the wall and is nailed to the beams using nails L \u003d 60mm. After that, a second board with a spike is laid and with the help of a mallet it is docked with the launch board. Further, according to the same principle, other boards of the ceiling board are installed.

After the ceiling board is ready, from the attic side, insulation and waterproofing material are laid on the vapor barrier. It is not necessary to cover the waterproofing on the ceiling beams themselves. Then, a boardwalk is attached to the beams of the ceiling with the help of nails.


