Search
Login
How to waterproof a bathroom (walls and floor) in order to reliably protect itself from a flood and not flood the neighbors from below
To avoid troubles with the neighbors below, so that children can splash merrily and so that mold does not start in the bathroom, it is necessary to reliably protect the walls and floor from moisture. We will tell you how to choose and apply the right waterproofing material.
Content
- Waterproofing, its types for indoor
- Rolled waterproofing that does not need to be glued
- Roll waterproofing that needs to be fixed video video
- Waterproofing by coating (bitumen and mastics) video
- The method of applying bitumen-rubber mastic for waterproofing
- Dry mixes for waterproofing
- Where to apply waterproofing, under the screed or over the screed
- How to waterproof a joint between a floor and a wall
- Waterproofing the bathroom wall
- Waterproofing the bathroom video
Waterproofing, its types for indoor
Waterproofing for indoor spaces is distinguished by the method of application.

Waterproofing is okleechnaya, coating and penetrating waterproofing.

Sometimes paint waterproofing is isolated, although it must be attributed to coating.
The only difference between paint waterproofing and coating waterproofing is only in a thinner layer of paint.
But a more convenient classification is the division of waterproofing materials into roll waterproofing, paste-like waterproofing, powdery and liquid waterproofing.
Rolled waterproofing that does not need to be glued
The simplest, but not the most reliable option for waterproofing the floor in the bathroom is the method of laying a plastic film with a thickness of at least 0.2 mm. under a cement screed.

It is very good if the coating is a whole piece of polyethylene, i.e. the entire floor area is covered entirely with an approach of 10-15 cm on the walls.
If the width of a piece of polyethylene is not enough, then the pieces are laid with an overlap of at least 20 cm on top of each other, the seams must be glued with tape, you can weld an iron through a newspaper.
On top of the first layer of polyethylene, a second layer is laid with a shift of the weld in relation to the seam of the lower layer by half the width of the film.
Then, on top, a cement-sand screed is laid in a simple way. Instead of polyethylene, at present, modern multifunctional materials are used.
In addition to waterproofing, they also serve as partial soundproofing.
Such material is freely laid with a soundproofing layer to the base of the floor and placed on the walls to the height of the finish coating.
All modern paintings are overlapped, joints are glued using self-adhesive bitumen tapes.
Roll waterproofing that needs to be fixed
A more reliable option is the method of attaching waterproofing by any available method.
Initially, as a waterproofing, they used cardboard, which was impregnated with bitumen, the result of this work was a ruberoid.
But since the base of the roofing material is cardboard, it collapses quite quickly and, accordingly, the waterproofing is broken.
Modern manufacturers, as a waterproofing material, offer reinforced fiberglass, fiberglass or polyester.
Fiberglass is a delicate material, as it is easily torn, it stands at the level of cardboard in strength, but it does not rot.
Fiberglass is more durable and flexible than fiberglass, but if it is stretched by 5-7% of the length, the fiberglass will tear.
Polyester is the leader among all reinforcing materials, it is able to withstand stretching by 30% of linear dimensions. Therefore, waterproofing based on polyester is effectively used in those structures that are subject to deformation.
Bitumen is used as an impregnation of all rolled materials; various polymers are added to it.
After impregnation, receive waterproofing materials resistant to frost and having good elasticity.
Such a roll coating may be weldable, i.e. it is laid with a burner.

Self-adhesive roll coating is considered more convenient to use.
In addition to roll waterproofing coated with bitumen, polymer-based waterproofing is used.
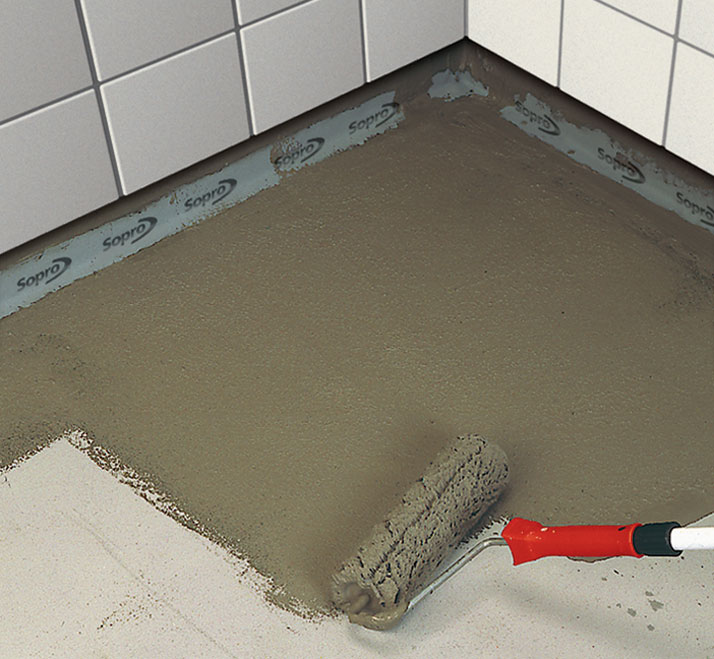
Usually this is a thick polymer film, one side of which has a self-adhesive layer, and the second side has a protective layer.
Such waterproofing has a very high elasticity and flexibility.
To use roll materials, you must have an ideal base.
The base must be perfectly flat and dry.
If the waterproofing is surfaced, then the floor must be treated with bitumen.
It should be noted that surfaced material for waterproofing standard small bathrooms is very rarely used, since it is very dangerous to work with gas burners in small rooms.
A wide range of waterproofing roll materials are produced by both Russian and foreign companies.
Waterproofing by coating (bitumen and mastics)
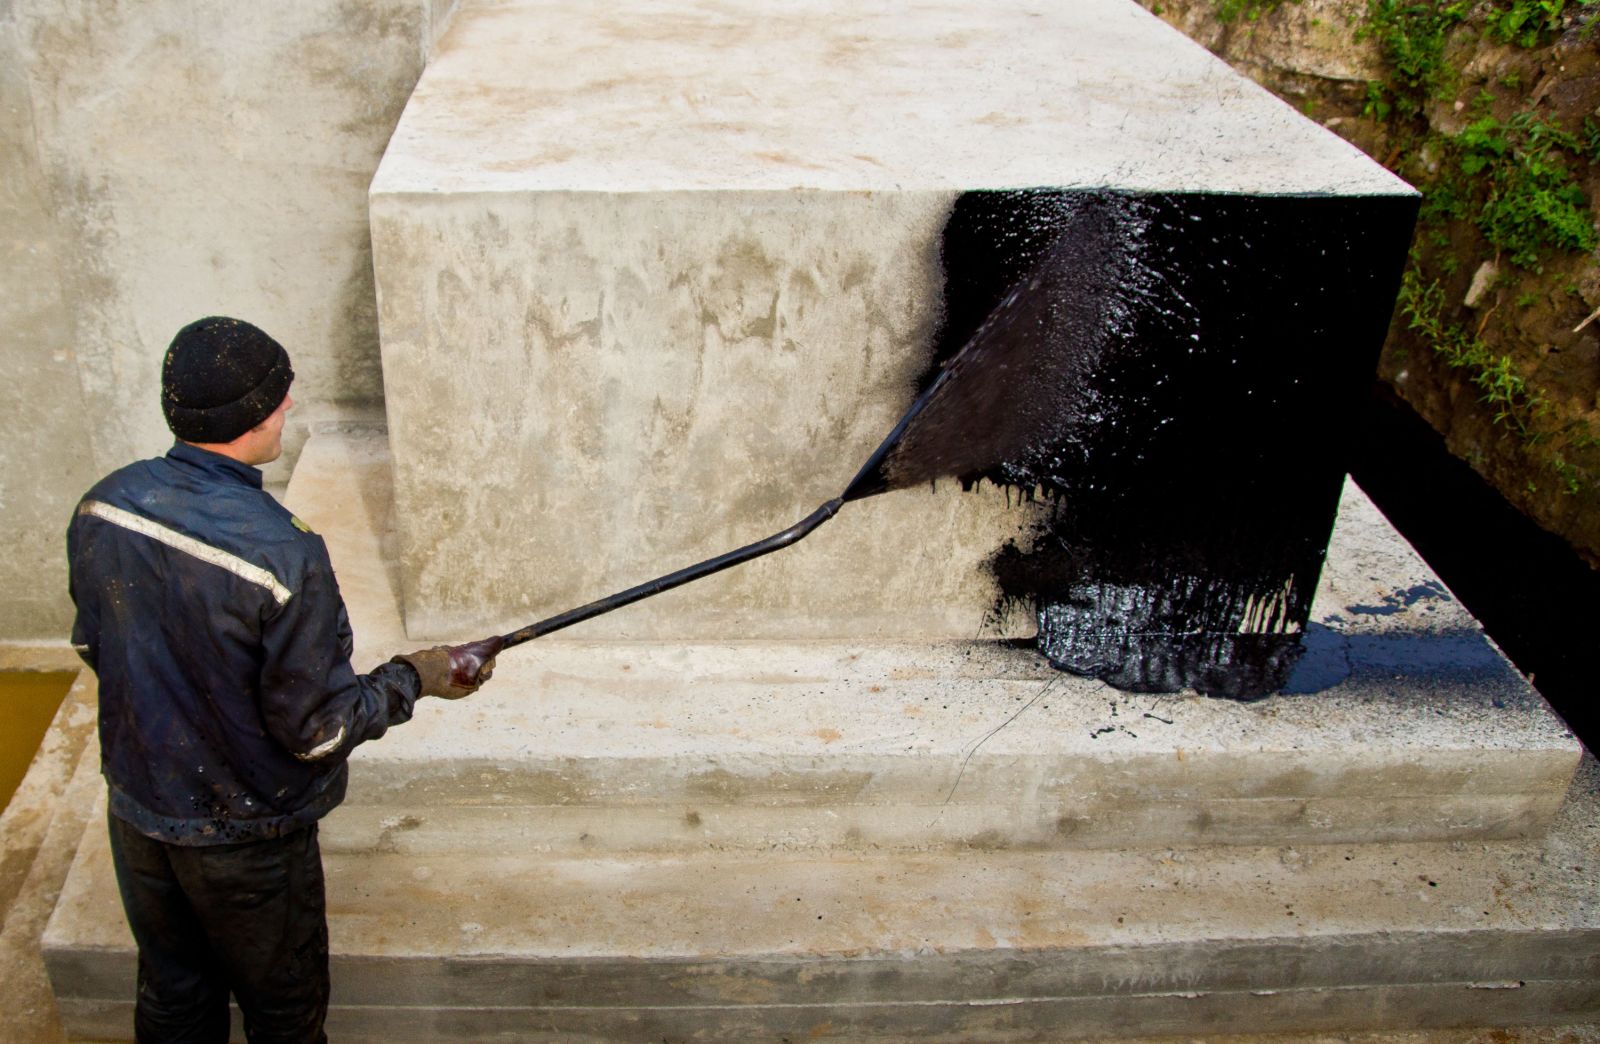
If you decide to waterproof the coating method, in this case it is necessary to apply a viscous fluid mass to the base.
This mass hardens and forms a continuous coating without seams and joints.

The cheapest option is to coat with conventional bitumen or products based on it.
But it is possible to work with bitumen only at a temperature not lower than + 12 * C, therefore, a more common means is coating waterproofing on a bitumen-rubber or bitumen-polymer basis.

This waterproofing is an aqueous emulsion of bitumen, latex or another polymer, technological additives are added to such emulsions to improve properties.
It is easier to work with such a composition, since they are plastic, do not contain organic solvents, have no smell, adhere well to all surfaces and are elastic.
There are quick-drying waterproofing, as well as innovative polymer mastics.
To improve the quality of waterproofing, sometimes a special polyester calendered geotextile is laid between the layers of mastic, the density of which is 100-110 g / m2.

The waterproofing with geotextile is more durable, the thickness of the waterproofing is more uniform.
In practice, this is done as follows: a layer of mastic is applied to the base into which the geotextile is recessed, one or two finishing layers of mastic are applied on top.
The method of applying bitumen-rubber mastic for waterproofing
Before starting the main work, it is necessary to carefully level and clean the floor from dust.
In this case, it is necessary to observe the conditions: the floor in the bathroom should be below the floor level adjacent to the bathroom room.
If this condition is not met, then a dividing threshold must be set between the bathroom and the adjoining room.
Then, using a special bitumen or bitumen-polymer primer (usually it is included in the range of the manufacturer of the mastic), it is necessary to prime the floor.

After an hour and a half, they begin the process of applying mastic waterproofing.
If a one-component mastic is used, it is already ready for use.
If two-component mastic is used, it must be mixed strictly according to the manufacturer's instructions.
The finished mastic, using a spatula, is applied to the floor and walls, 150-200 mm high. from the junction.
The waterproofing layer should dry within two hours.
After the mastic dries, if necessary, a thin cement screed is placed on top, tiles are laid on top of the screed.
When working, carefully read the instructions, special instructions can be given there.
Dry mixes for waterproofing
A certain niche when working with waterproofing is occupied by cement-polymer compositions, in the form of dry mixes.
The basis of such mixtures is cement, it provides excellent adhesion to the surface.

The mixtures contain synthetic additives - their task is to ensure the elasticity of waterproofing.
If the composition contains one component, the composition is diluted with water.
If there are two components, it is diluted with a polymer-based emulsion.
Cement-polymer mastic can be both penetrating and coating waterproofing.
If the mastic is penetrating, special active additives easily penetrates the material to be protected, insoluble crystals form inside it, these crystals are able to fill all capillaries, pores and cracks - thereby increasing the strength of the material and blocking the path of water.
If the waterproofing is coating, i.e. a dense waterproofing layer is created and it prevents the penetration of water, such a coating waterproofing is rigid and elastic.
If the house is old, all the shrinkage of the walls has occurred - apply rigid waterproofing, it is cheaper.
If the building is new, shrinkage shifts take place in it - in this case they do not save and buy flexible waterproofing.
Work with dry mixes is carried out according to the instructions of manufacturers.
The dry mixture is diluted in containers with clean water, mixed thoroughly, left for 3-4 minutes to ripen, mixed again and evenly applied waterproofing layer with a brush, roller or smooth spatula.
The air temperature in the room where the work is performed should not be lower than + 15 * C, air humidity not more than 60%.
Where to apply waterproofing - under the screed or over the screed
The answer to this question is not always unambiguous.
In theory, waterproofing should be protected from mechanical stress, and it can be protected with a screed.
But, if a leak occurs, the screed can absorb water and become deformed.

Modern builders come to the conclusion that it is better to apply the final coating on waterproofing, without additional screed.
But, if warm floors are arranged in the bathroom, then a special elastic coating coating is applied over the screed, under a layer of glue.
This waterproofing method can protect both the cable and the cable tie.
How to waterproof a joint between a floor and a wall
The transition points of the waterproofing from a horizontal surface to a vertical one should ideally be covered with fillets with a radius of 100-150 mm.
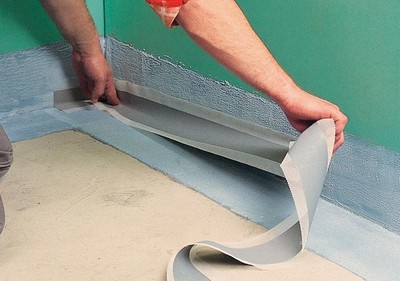
In practice, usually these transitions are glued with a special waterproofing tape or reinforced with a mesh.
A mesh or tape, a strip of 20-30 cm. Of width, is recessed into a freshly laid layer of mastic.
This method is able to protect the bath comprehensively from water, even with dynamic vibrations of the building.
Waterproofing the bathroom wall
The bathroom wall is subject to splashes and drops (marked in blue), so it is necessary to protect the wall that adjoins the bath or shower, washbasin (if any), and the toilet.
Usually they do not completely protect the wall, but to a height of 1.5-1.6 meters.

For such protection, paint waterproofing is used, for solving such issues there are all kinds of varnishes and paints.

