Search
Login
Epoxy grout - mosaic tile joint filler
A mosaic tile coating looks very effective and stylish, but for a mosaic tile, for its long-term operation, it is necessary to eliminate a weak spot. The weak point of the mosaic tile is the butt joints, therefore, the material filling these joints should be as strong as the mosaic tile itself.
Content
- The benefits of epoxy grout
- Using Kerapoxy Design Epoxy Grout video
- Application Points for Kerapoxy Design Epoxy Grout
- A necessary tool for work
- Preparation of the dry mix to work
- The method of applying epoxy grout
- Remove excess solution
- The use of epoxy grout as a glue for mosaic
- Kerapoxy Design in color
The benefits of epoxy grout
The requirements for the material filling the tile joints are very high.
The inter-seam material must be very strong and at the same time flexible.

Epoxy grout should not crumble, get dirty.
An important factor in the use of epoxy grout is its color, it is desirable to select a color to match the specific coating.
In this case, we can get a single mosaic, the impression of a filigree handmade mosaic.
Kerapoxy Design Epoxy Grout will help to solve all your tasks.
Using Kerapoxy Design Epoxy Grout
Kerapoxy Design decorative joint filler is a two-component.
This grout is an epoxy acid resistant product.

Epoxy grout works efficiently, both outdoors and outdoors.
This product is not afraid of moisture, can withstand various acidic environments, the decorative effect exceeds all expectations.
Moreover, the decorative effect is enhanced with the use of the metallized additive MapeGlitter, this additive gives the finished seam a pearlescent shade and shine.
Application Points for Kerapoxy Design Epoxy Grout
The above advantages of this epoxy grout, ensures its use in flooring, walls in the most critical areas, where there is a large load on the bases: in concert and exhibition halls, various galleries, etc.
Due to the fact that the epoxy grout is not afraid of water, it is resistant to an acidic environment - it works great in showers and bathrooms, in a steam room, sauna.

This epoxy grout is indispensable for arranging a Turkish bath and swimming pools.
Especially if the pools are filled with mineral or sea water - this water is more aggressive and thanks to the unique abilities of this grout, many problems are solved.
When lining glass substrates, Kerapoxy Design epoxy grout forms a translucent layer that can partially transmit light.
This grout works great on fiberglass and plastic (PVC) substrates.
A necessary tool for work
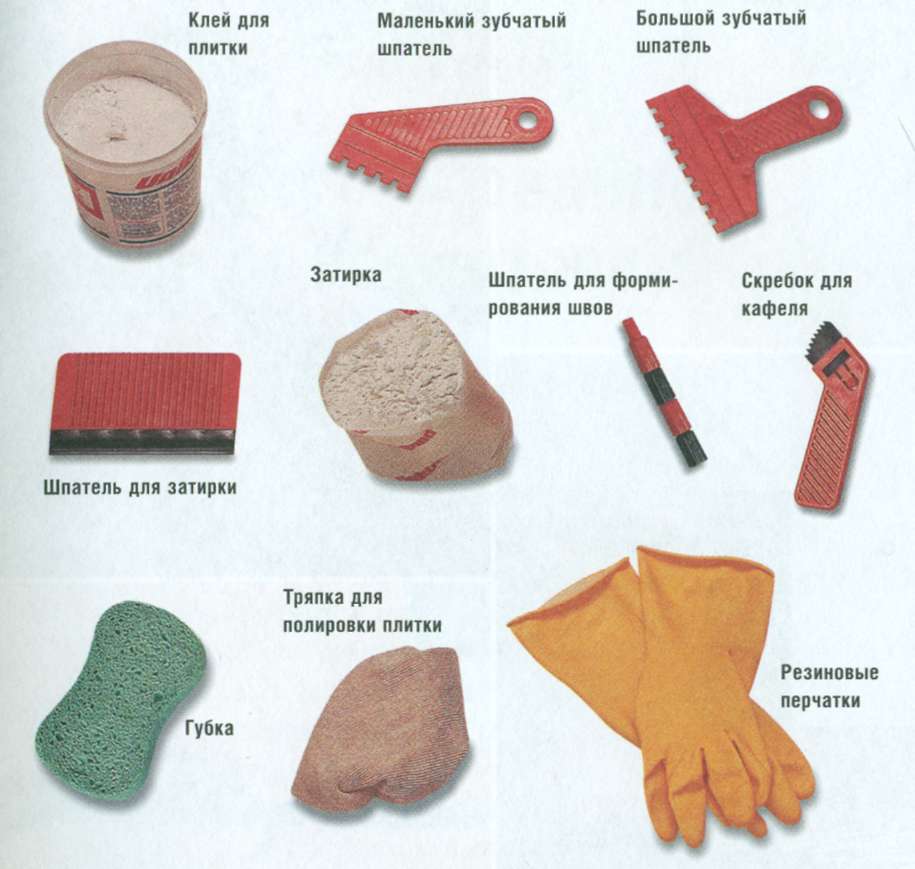
To work, you need the following tools and materials:

- An electric or cordless drill, or a specialized construction mixer. This tool should provide high torque at low speed, for dilution of epoxy grout;
- Master OK;
- flat rubber spatula;
- two containers with clean water;
- gloves;
- sponge.
Preparation of the dry mix to work
Kerapoxy Design Epoxy Suture Filler consists of two components, usually supplied in buckets.
Initially, the bucket contains component A, component B is added to it.
All recommended proportions are reflected in the instructions.
To obtain a guaranteed high-quality result, it is necessary to carefully follow the prescribed recommendations.

The resulting mixture, using a construction mixer, is mixed qualitatively until a homogeneous solution with a plastic consistency is obtained.
The construction mixer (or drill) must work at low speeds to prevent the solution from overheating.
Overheating of the solution will lead to a decrease in its working time, and the prepared solution must be used within 45 minutes (this is its working time).
The method of applying epoxy grout
Using a flat rubber spatula, the seams are completely filled with epoxy grout.
Kerapoxy Design grout has a highly plastic consistency, so it is very convenient to use and this is its advantage compared to traditional epoxy mortars.

To work with this grout is quite easy and fast, the losses are minimal, and the excess is easily cleaned from the surface of the mosaic.
Remove excess solution
Within 15-20 minutes after applying the grout, while the solution is still fresh - it is necessary to remove excess from the surface of the lining.
Using a rubber spatula, cleaning with diagonal movements in relation to the seams.
If you have to clean large surfaces of the floor, cleaning is carried out using a single-head rotary machine, it is equipped with special abrasive felt disks.
After removing the excess, immediately wash the surface with a fibrous sponge with a little water.
Then clean sponges produce final cleaning.
Important! Each side of the sponge is used only once, after that, it must be thoroughly washed. For this purpose two containers with water are used, rough work is carried out in one container, and in the second sponge they are cleaned cleanly.
After a day, a small foot load is possible, and after four days - full operation.
In this way, high hygiene is guaranteed and mold and mildew are blocked.
Applications of epoxy grout as glue for mosaic
Kerapoxy Design Epoxy Grout can be used as an adhesive.
The above-described method prepares the working mixture.
Using a notched trowel, this finished mixture is completely applied to the surface of the tile, then it is laid and pressed.
Kerapoxy Design in color
Kerapoxy Design Epoxy Grout has 32 colors.

Hue number 700 is transparent.
To diversify the color gamut, it is possible using the metallized color additive MapeGlitter.
This additive has a traditional color - silver and light gold, but an additional 22 shades are produced on request.
The maximum dosage of MapeGlitter is 10% by weight.
This concentration is recommended when working with dark saturated shades, black No. 223, dark green No. 216, dark blue No. 222.
For the rest of the color, a 6% MapeGlitter supplement is sufficient.
It should be noted that a six percent solution is very plastic, it is easy to work with, and a ten percent solution is a little tougher.


