


Sewer system for the home. Cesspool: types: sealed sewage pit, concrete structure, two-chamber septic tank, three-section septic tanks, cesspool made of bricks, car tires for the pit. Do-it-yourself sewer system.

Housing without basic amenities today does not suit either urban or rural residents. If the issue of water supply is solved quite simply - by connecting to a water supply system or a well constructed on a site, then the issue with drains is somewhat more complicated - it is not always and not always possible to run into a centralized sewage system. In suburban homes, today they practice the construction of autonomous external sewage systems; for the accumulation of wastewater, they use specially equipped pits in this way.
Content
- Sewer systems for the home
- Connection of the sewer system, options video
- Cesspool types
- Do-it-yourself sewer system of a private house (step by step)
- Useful Tips
Sewer systems for the home
According to experts, the arrangement of the sewer system of a private house is a fairly simple task, however, in order for the sewage system to work for many years and not create special problems during operation, knowledge and implementation of some rules will be required.
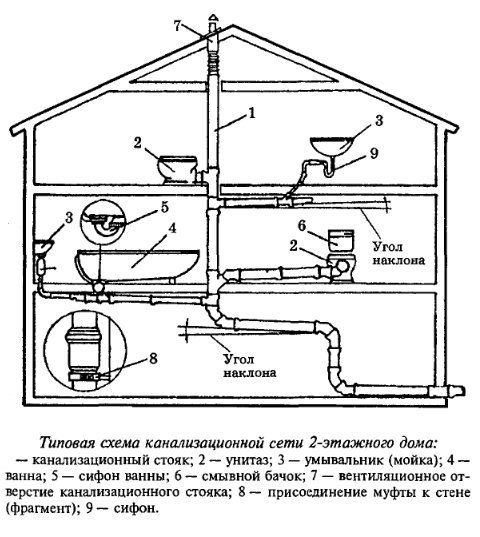
Since sewer pipes are laid both inside the house and outside, the system itself is divided into internal and external. Despite their close relationship, they are being built separately. Start work from the inside.
When working, they use an extremely simple scheme, determining the location of wet rooms, i.e. those into which water will be supplied decide where exactly the water intake devices will be installed. It is best to make a sketch and apply dimensions to it; you can use a copy of the project of the whole house, if any.
Sewer pipes should be laid from already installed plumbing fixtures towards the outlet of the sewer pipe.
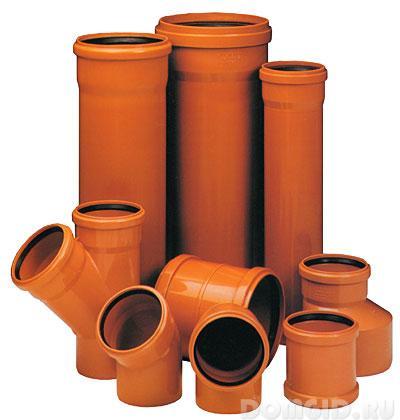
To determine the required number of pipes and auxiliary fragments (crosses, tees, bends, couplings, fasteners) we use the same detailed house design or sketch. Pipes and fittings for sewage should be purchased with a margin.
Connection of the sewer system, options
The internal pipe wiring can be carried out in two ways:
- open, which involves laying the pipeline on floors and walls
- hidden when the pipes are hidden, sinking them into the gates made in the floors or walls
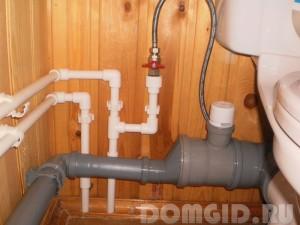
For convenience, it is often practiced laying sewer pipes and supplying water in one shtroba. In this case, it is customary to lay water pipes higher, sewer pipes - under them. The method allows you to save on material for embedding the gate, and also greatly simplifies the installation process.

Since the sewage system in a private house is self-flowing, the pipes should be laid at an angle to the drain. The use of pipes with a diameter of 50 to 80 mm implies a pipe slope of at least 2 cm on each meter.
Too large a bias, as well as too small, is not recommended, it will provoke the appearance of blockages.
To connect any plumbing fixtures, pipes with a diameter of 40-50 mm are used. The exception is the toilet, for its connection with the riser, it is recommended to use a pipe of 100 mm. The pipe of the same diameter is used for the riser; in the event that the house has several floors, and wet rooms are on each of them - you can take a pipe of 110 m.
Do not forget about the need to install hatches for cleaning pipes.
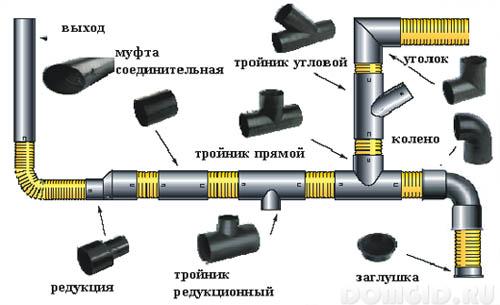
More about the pipes themselves - if several decades ago heavy cast iron pipes were used as sewers, today in most cases they resort to the installation of light and sufficiently strong polypropylene (PP) or polyvinyl chloride (PVC) analogues. Installing them is much simpler, and in order to cope with the task faster, it is recommended to find an assistant.
An important point - on the release of all types of sanitary equipment it is required to install water locks - they will prevent the appearance of an unpleasant odor in the house.

Specialists advise installing grease traps for the sewage system of the sink and the dishwasher.
The ideal option would be if all branches of the internal sewage system converge to one riser.
To withdraw the sewer pipeline, choose the wall of the house, which is located on the side of the sewer pit.
Types of cesspools
A lot of problems will arise during the planning and construction of the sewage system in a private house, but comfortable living in the house and the ecological state of your site will ultimately depend on their successful solution.
Since cesspools of any type require periodic cleaning, their placement should be planned in such a way as to allow free access of special equipment.
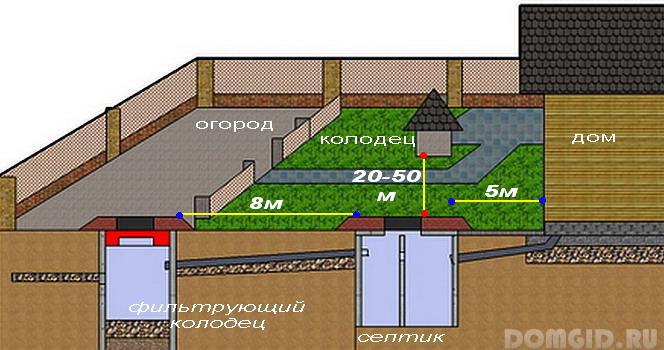
The second important condition is the placement of the cesspool at a distance of not less than 25 m from the source of water (well or well). If the site is small or has such a shape that it is not possible to comply with the condition - initially you should plan to use plastic sealed containers for wastewater.
It is not recommended to plan the placement of sedimentation tanks on the lowest points of the plots, in the spring it is possible to flood it with melt water - pollution by sewage from the adjacent territory cannot be avoided.
It should also be remembered that in SNiP it is recommended to observe the distance from the cesspool to the living room - it should not be less than 5 m.
In depth, the sewage pit should not reach the level of groundwater; non-compliance with the rule will lead to a deterioration of the environmental situation.
According to the recommendations and sanitary standards, the volume of the cesspool should be calculated based on the norm of water consumption by the tenant of the house, i.e. half a cube per person. But practice shows that it is better to take into account the indicator of 2 cubic meters of water for each tenant, this indicator is more consistent with reality.
In reality, in order to save money, it is best to plan the volume of the cesspool, corresponding to the tank capacity of the scavenger machine.
When choosing a cesspool option, you should also consider whether the owners live in the house permanently, live only in the summer, or come only on weekends. In the latter case, it will be enough to install an inexpensive simple design.
If the need for waste disposal exists, it is constantly recommended to think about the construction of a capital cesspool.

She may be:
- absorbing, i.e. have no bottom
- tight
- funded
Let us consider in more detail each variety.
absorbing settling pit
This building is quite simple, but dangerous for the environment. There is no bottom in it; the effluent is cleaned by filtering through the so-called earthen filter. Typically, such pits have small dimensions. At the beginning of operation, the process of filtering effluents occurs quickly, water is absorbed into the soil, if it is not clay, well.
Then the tank is filled with poorly filtered sludge, cleaning will be required. A bottomless pit will be a constant source of environmental pollution, which is especially undesirable if a toilet runoff is organized into it.
sealed sewage pits
The material for their construction can serve:
- prefabricated concrete rings
- brick
- solid concrete
Such structures do not cause special harm to the environment, but create problems for the owners, because It will be necessary to constantly order sewage equipment for pumping wastewater. More rational is the construction of a septic tank with a mechanical type of cleaning, single-chamber or two-chamber (mgamera).
single chamber septic tank
Represents a failure of the same pit without a sealed bottom. Its base is laid out with a thick layer of rubble or broken brick. It is this layer that serves as the first coarse filter, the next filter layer is soil. He carries out the second stage of cleaning.
Multi-chamber septic tanks provide a higher level of purification, while the liquid is purified to the extent that it can be watered with plants.
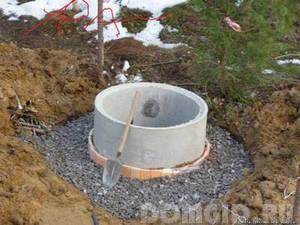
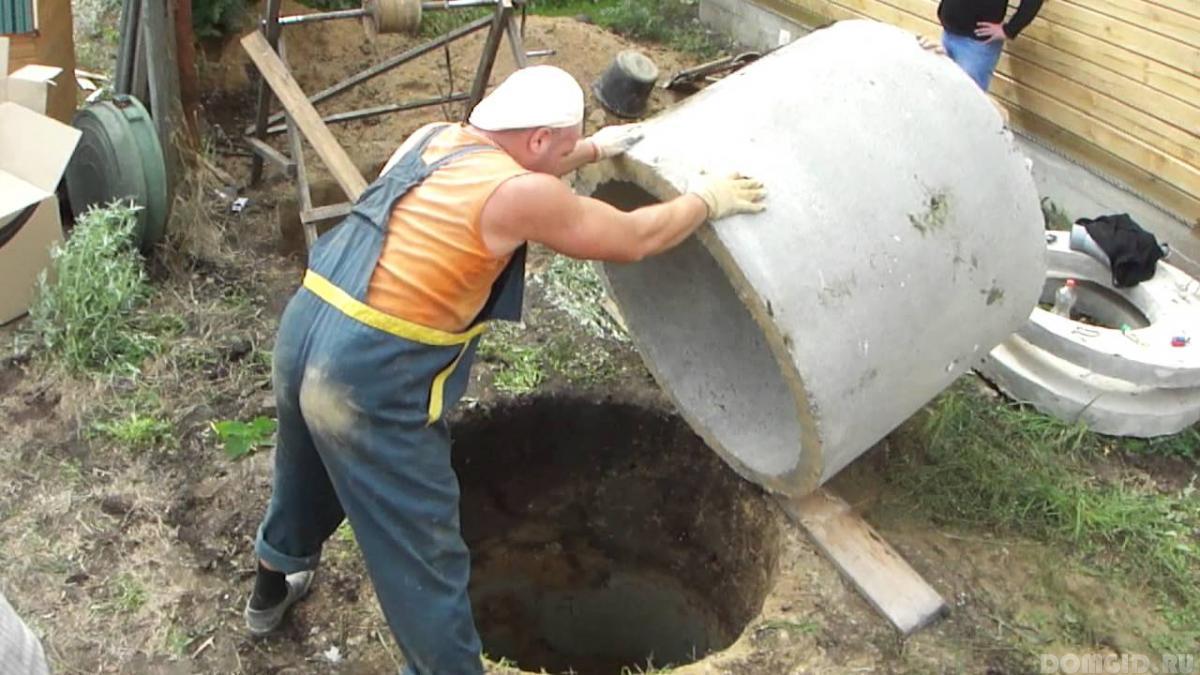
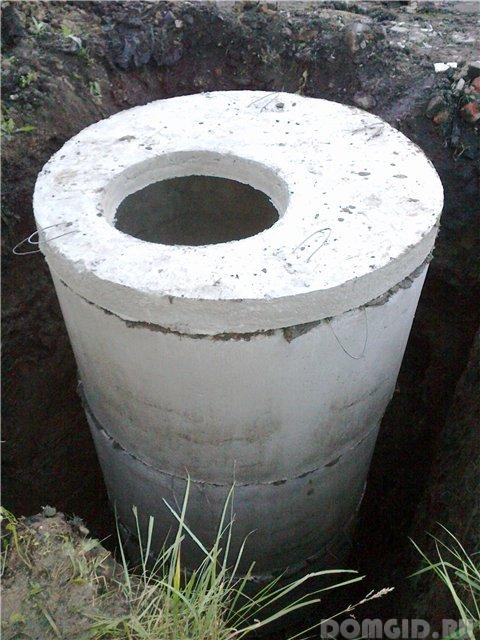
cesspool of concrete rings
Suitable materials for permanent structures are brick and concrete. Concrete can be solid, or you can use ready-made concrete rings. The bottom is concreted first, the concrete recipe is standard.
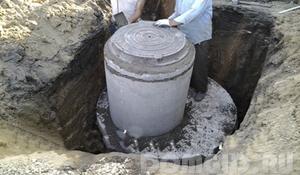
Next, the rings are mounted, followed by sealing the joints. The disadvantage of such a structure will be the need for continuous cleaning.
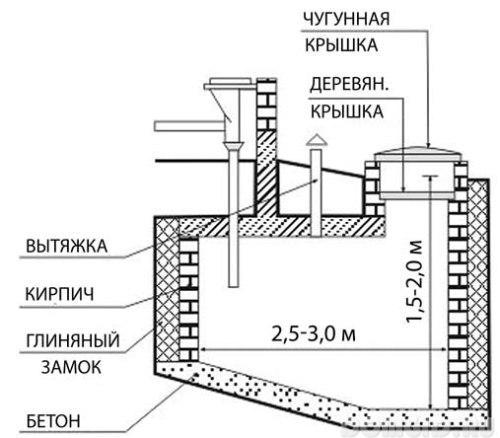
solid concrete structure
The construction of such a pit will cost a little more, and more time will be required for the construction. Construction begins from reinforcing the bottom and pouring it with concrete. Then, formwork is constructed from improvised materials and poured with concrete.
The service life of such a sump can be equal to the life of the house, among its advantages - tightness and almost constant volume, it eliminates the possibility of sewage in groundwater. But at the same time, problems with the systematic pumping of effluents will not disappear.
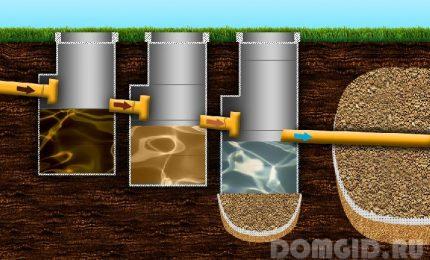
two-chamber septic tank
This option can be safely called more perfect and effective. Construction involves the construction of a large pit, divided into two parts in a 2: 1 ratio. Connect the pits should be a duct.
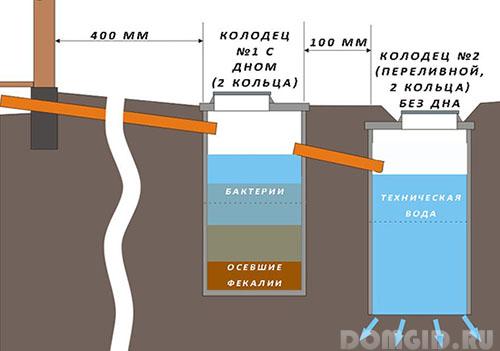
Initially, the sewer discharges fluid into a larger compartment. It settles most of the sludge. Settled water through the duct will enter a smaller compartment. It will need to be equipped with a drainage well. The liquid purified from insoluble sediment through the drainage will go to the ground.
The need for pumping out drains will decrease, the sewage machine can be called less often.
three-section septic tanks
With all their advantages, they will require the purchase and installation of expensive equipment:
- compressor with timer - to organize the work of the second compartment
- drainage pump - for the third compartment
brick cesspool
For the construction of a major septic tank, you can use a cinder block or brick. They begin work with arranging the bottom of the pit, they fill it with a layer of sand about 20 cm thick, tamp, fill it with a layer of concrete. After it completely hardens, walls begin to be erected.
In summer cottages in brick pits, the bottom is not made, and gaps are left between the bricks.
temporary wood pit
For construction, even a wooden board can be used. But before installation, the wood will need to be treated with special means that will protect it from moisture. In practice, it turns out that the boards are assembled in exactly the same way as on the formwork.
It should be noted that with relative cheapness, such a design is able to provide a sufficiently high-quality insulation. The service life of this design is no more than a decade.
car tires for cesspool
Even old tires can be used as building materials. Naturally, the cost of such a pit will be insignificant, no finishing will be required for it. Old rubber will serve about a quarter century. All is good, but the sewage will very easily pass through such a structure, i.e. soil contamination will occur constantly.
plastic containers
The simplest and most modern option is the use of ready-made plastic containers.
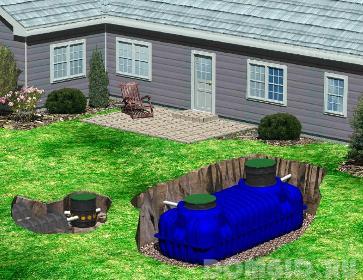
They are airtight, guarantee the preservation of clean soil. But the accumulated waste water from them will have to be pumped out systematically. Also, to avoid problems during operation, it is recommended to fix plastic tanks with concrete, both from below and from above - soil pressure can displace containers to the surface.
Do-it-yourself sewer system of a private house (step by step)
Work on the construction of a cesspool for a private house can be divided into several stages.
The first one produces:
- pit volume calculation
- layout
- selection of building material or materials at hand
- finding a suitable place
- and, in fact, digging a hole.
The shape of the pit and its parameters can be arbitrary if other buildings on the site do not make adjustments. Often the shape is determined by the materials used, for example, old tires or concrete rings, the pit in this case will have a rounded shape of a small diameter, you can increase the volume only by deepening the pit.
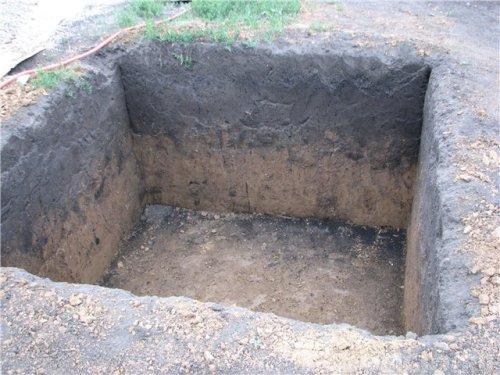
If you do the work on your own using an ordinary shovel, then digging a hole will be a rather lengthy and time-consuming process.
Next, you should do the arrangement, i.e. install ramps, boards, rings, perform concrete work.
Concrete can be prepared according to the recipe: 1 part of cement x 2 parts of sand x 4 parts of crushed stone + water until a thick sour cream is obtained. It will take about a week to solidify such a mixture.
If ready-made concrete rings are installed, then as a sealant between them, it is possible to lay strips from cut old autocameras, and seal the joints with cement-sand mortar.
In an exploited year-round house, you will need to pay attention to the insulation of the pit.
They equip a thermal insulation system by laying a layer of mineral wool between the outer side of a concrete wall or ring and soil, then fill it with soil. It is recommended to carry out insulation to the depth of the alleged freezing of the soil.
The hatch can be made of planks, processed with mastic before installation. The hatch must be equipped with a hole with a diameter of at least 10 cm. Sometimes ready-made concrete or metal hatches with holes are used.
The recommended location of the cover is above ground level. This will prevent the threat of flooding the pit with melt or storm water.
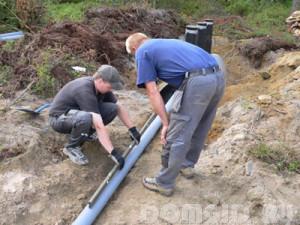
After completion of the arrangement of the settling pit, you can start digging trenches for laying the sewer pipeline. The depth of its laying should be calculated according to the level of soil freezing in a given area. Typically, the depth of the trench is within 0.7m - 2m.
If the trenches are digging small, then heat-insulating work will be required.
Pipe laying must be carried out with a bias towards the drainage pit.
To calculate the slope, there are special formulas, but you can use the already verified numbers:
- if the diameter of the pipe is within 50 mm, a slope is made of 3 cm per 1 m of pipe
- if the diameter is up to 100 mm - 2 cm per 1 pipe
For laying outdoors, it is recommended to use pipes of a red color, this color in the soil is much more noticeable, and the material itself is characterized by increased stiffness, because the pressure from the soil will be applied to the pipe walls. If possible, buy even more durable, two-layer corrugated analogues. The most suitable pipe diameter for the outer pipe is 110 mm.
After the installation of the pipes, the trenches, as well as the space around the cesspool, are covered with earth and leveled.
Sewage pipes at the entrance to the pit are not fixed - so that later, when the soil moves, they are not exposed to destructive loads.
When using plastic tanks, the sequence of operations is the same, septic tanks are installed in the dug pit, pipes are connected, filling with soil is performed.
Useful Tips
When planning the construction of a sewer system in a private house, it should be borne in mind that its operation will require fixed costs associated with the need for pumping and removal of sludge.
The level of fluid in the pit will have to be monitored constantly, a signal that it is time to order a sewage machine - raising the level of fluid in the sump to a height below 0.3 m from the ground level. The sedimentation tank must not be allowed to fill upwards - there will be a risk of sewage entering the soil surface, i.e. contamination of the site will occur.
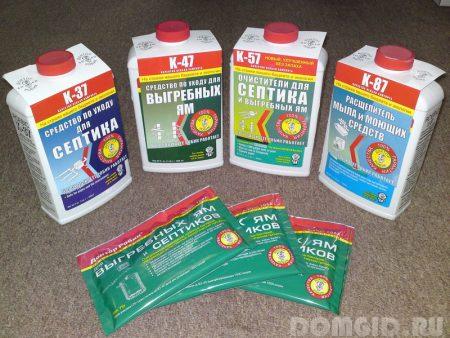
To reduce the cost of removing the contents of the pit, you can resort to the use of special preparations for cesspools, under their action, the solid sediment is actively destroyed, in addition, they remove an unpleasant odor. Of course, buying drugs also costs money.
Since the sewage pit is far from the best decoration for the site, a plan for masking it should be developed.
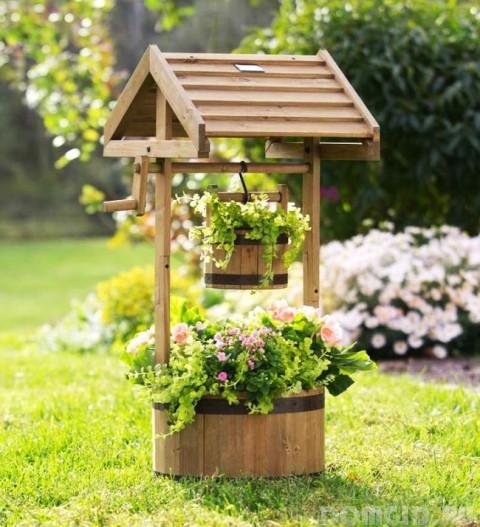
For example, you can use a flower garden: arrange flowers planted in containers around the perimeter of the hatch; for decorative purposes, you can use artificial acrylic stones, decorative stumps, small garden polymer or gypsum figures; to establish decorative structures made of wood (houses, wells, mills); sometimes resort to decorating the lid itself, using paints or stickers.
