Search
Login
Pond on the site
The best time to build ponds is spring. The construction of ponds involves a large amount of earthwork, of course, there will not be required such volumes as in the construction of pools, but the volumes are still significant.
Content
Pond with waterproofing film
For ponds, a pit of 0.7-1.7 meters is enough. The first stage involves marking the pit, decisions are made regarding the slope of the walls of the pond, places for terraces to place vegetation. We remove the top layer of soil (turf), and begin earthwork.
When digging a pit, its walls must be constantly compacted so that they do not crumble.
If necessary, the walls are wetted with water, all sharp objects (pebbles, various inclusions of an acute form) are removed, as this can cause damage to the waterproofing film.
The horizontal terraces for vegetation in the wall of the pond should have a width of at least 10 cm, should not have slopes in any direction, i.e. perfect horizontal.
Upon reaching the specified depth, the bottom of the pit should be compacted and then sprinkled with wet sand. The thickness of the sand layer is 3-4 cm. When all these work has been done, you can begin to line the pit with a film.

Without excessive tension and indentation, the film is laid from the center of the pit to its edges.
The film laid in this way should be kept for at least 4 hours, the edges of the film around the perimeter of the pit must be fixed, this can be done by crushing the edges with stones, or fixed with pegs driving them into the ground.
Preparatory work begins to fill the pit with water, for this you can draw water using a flexible hose, lowering it to the bottom of the pit.
Filling should be done slowly with small pauses, it is better to fill with settled water, since in this case the water is deferrized.
If somewhere around the perimeter of the film is strongly stretched, it is necessary to loosen the film tension, i.e. when lining the pit with a film, it is necessary to leave a supply of film at the edges.
When the water begins to fill the terraces, monitor the tightness of the film in all corners.

Further facing works are carried out on the coast of the pond.
When carrying out these works, it is necessary to ensure that lime water does not get into the water of the pond, otherwise this can cause the death of fish, which can subsequently be populated by the pond.
Facing tiles or stone along the edges of the pond should be laid so that their edges hang over the water by at least 5 cm.
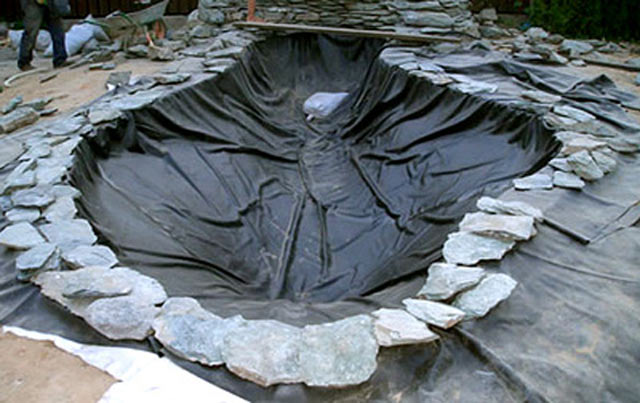
Then placed on the terraces of water plants in plastic pots.
You can run fish into the pond only when the plants take root in the water of the pond - this indicates the frequency of the pond and the absence of harmful impurities.
A pond constructed in this way can be a worthy addition to the overall design of the site. But still it’s not decorative pond.
Decorative pond
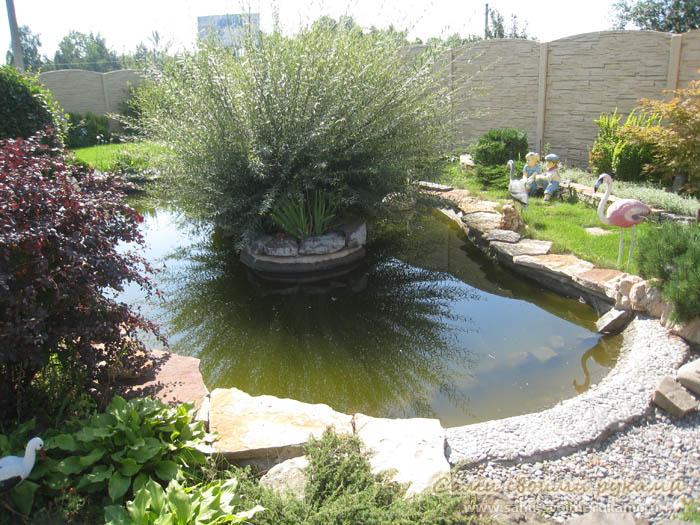
A decorative pond implies a minimum of artificiality. Such a pond should have a natural bottom (soil), and the shore.
Water plants grow from the soil bottom and not from artificial pots, fish in the pond should be bred of ordinary species, and not decorative breeds.
Plants will most naturally look like local wild species.
In the construction of a decorative pond, primarily local natural materials are used - sand, pebbles, heavy soil to form the bottom and only butyl rubber rubber is used from artificial materials; pebbles are used to form the shore of the pond.

During construction, they dig a pit; moreover, the form of the pit should not have the correct geometric lines, it should correspond to the relief of the site.
The depth of the pit should be different at different points, but a site with a depth of 0.6 to 1.5 meters is required.
This is necessary so that microorganisms and fish can survive in the winter.
When the pit is formed, it is necessary to compact the soil, providing a solid, even surface.

Then washed sand covers the entire bottom of the pit (sand thickness 5 cm).
In this case, the sand should be wet, if the sand is dry it must be moistened and compacted with a hand roller, thus creating a dense layer.
Over the edge of the pit, the sand layer should extend 25-30 cm. Therefore, when digging the pit, make sure that the bottom relief is gentle.
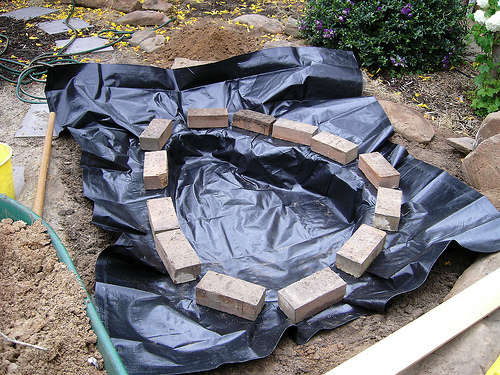
Now we are engaged in waterproofing.
In any case, the bottom area is quite significant, it is best to produce waterproofing with butyl rubber rubber, since it coalesces well with a needle and kapron thread, while not losing its structure and maintaining the quality of the waterproofing.
Stitched strips need to cover the entire bottom of the pit, straighten all the folds, displace the air under the film.
It should be straightened, starting from the middle of the pit.
The edges of the film should extend 25-30 cm beyond the edge of the pit. The edges of the film can only be fixed with objects weighing no more than 2 kg., Should not be fixed with rods driven into the ground, since when laying a second layer of sand on the film, it will stretch and may break .
The second layer of sand is laid on the rubber in the same even layer with a thickness of 5 cm.
The laying method is the same as the first layer.
Beyond the boundary of the pit, the second layer of sand should extend 15 cm, that is, do not cover the film completely underneath.
Then a moistened (required) soil layer up to 8 cm thick is laid. After laying it is necessary to wait 2-3 hours until the layer hardens a little.

At this time, you can engage in the formation of the coast, i.e. a layer of pebbles is laid according to the principle of artistic mess.
A strip of pebbles with a width of at least 30 cm is formed along the perimeter of the pond, and together, where shallowing is planned, the pebbles should go 5 cm under water.
A pond created in this way will be beautiful in its naturalness.

Next, fill the pond with water.
In order not to form a recess at the bottom of the flowing jet, the hose should lie on the bottom of the pond on a sheet of plywood, it must be filled with a weak stream of water.
When the pond is filled with water, it is allowed to settle, once again inspect the bottom from the shore of the pond.
If there are any problems, they will need to be fixed later.
After two, three days you can start planting plants. See article (Plants for a pond).
Rigid small pond
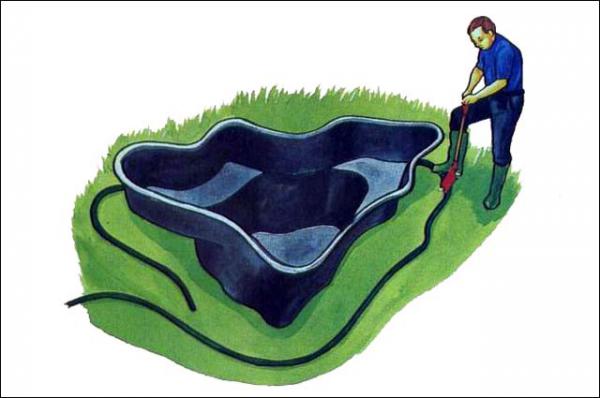
For this pond, it is necessary to purchase a bowl of rigid construction, now there is a huge assortment of these products on sale.
Earthwork is carried out in a smaller volume than in the construction of a pond with flexible waterproofing, but the difficulty lies in the fact that the foundation pit must be dug in strict accordance with the rigid structure, otherwise the error will entail an additional amount of work.
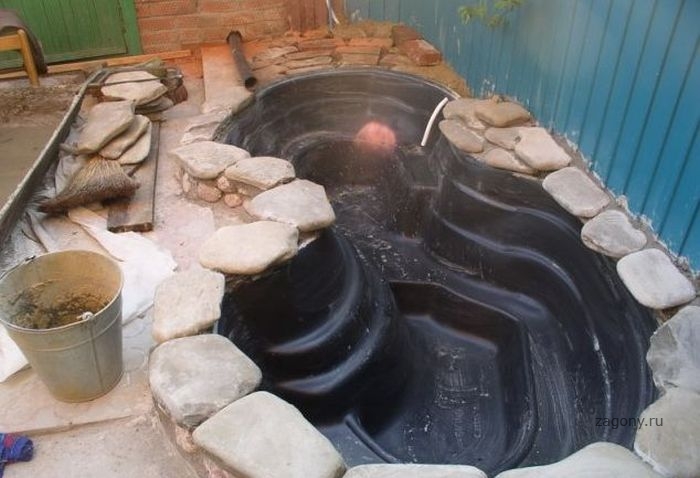
The foundation pit should be dug 2-3 cm deeper than the height of the mold.
The bottom and terraces of the pit must be strictly horizontal, otherwise the mold may be deformed when filled with water.
The soil at the bottom of the pit must be compacted, the walls must be compacted, a layer of sand 2.5 cm thick is poured on the bottom and carefully leveled, the mold is lowered and slightly pressed into the bottom of the pit.
Then the form is lifted, the traces left by the form on the bottom and walls of the pit are inspected.
If the form does not lie evenly, additional work is carried out to align the bottom and walls, then finally install the form in the pit.
In principle, if the markup was done correctly, then installing the form does not take much time.

After the previous work, they begin to gradually fill the form with water.
If you did not do the previous work carefully, the form will give a deformation that will appear in the bends of the edges of the form.
In such cases, you will have to drain the water, remove the form from the pit and eliminate the defects.
After the form has densely sat in the pit and is filled with water, you can proceed to facing.
Cladding plates or natural stone is laid so that they hang over the water by 4-5 cm.


